Planting a Vegetable Garden

Vegetables harvestedfrom the garden
With the cost of living soaring ever higher and all the crises that we encounter it has become increasingly difficult to make ends meet for most people. Fruits and vegetables is an essential daily need and herbs are essential for both cosmetic and medicinal value. Apart from the economic value to be gained from vegetable gardening in your own yard, it does not hurt to be able to pick fresh produce for the table and have a home pharmacy to boot. Furthermore a vegetable garden can also double up as a children's garden, a great way to introduce the value of gardening and vegetables to your young ones. One packet of seed will cost you less than a Sunday newspaper, and by using kitchen throwaways (for making compost), excess water from rinsing fruit and vegetables in the preparation of food (for irrigation purposes), and free sunlight, you can create your own vegetable garden and ensure that you and your family have a nutritious plate of food that is crammed with vitamins, proteins and minerals throughout the year. You do not need great expanses of space either. With a little skill you can use a section of your back yard for your vegetable garden, preferably 4m by 4m (160 by 160 inches), however it is best to start with a small area such as 1m by 3m (30 by 120 inches) which would be able to sustain a family of four. If you live in an apartment or flat, you can even make use of containers on your balcony to grow your own vegetables. All that is required would be two troughs that measures about 25 cm by 100 cm (10 by 40 inches) each. Even an old wheelbarrow with a few drainage holes can work as the perfect portable container for a vegetable garden. It would have the added advantage that you will be able to wheel your vegetable garden out of harm's way and to the most optimum spots on your yard for maximum results. There is nothing like the taste of a cherry tomato, freshly picked off the vine and still warm from the sun. Just imagine the pleasure of picking your own leaves from your home vegetable garden to make a salad. Organic homegrown vegetables not only taste better, but it is also much more nutritious than those that are readily available from supermarket shelves. Often one hears from nutritionists that vegetables start losing their nutritional value the moment they are picked. Thus fresh is best, hence homegrown vegetables is best. If you get the basics right, then cultivating and maintaining a vegetable home garden is a sheer pleasure.
Vegetables such as potato, artichokes; both the genuine and the Jerusalem Artichoke, asparagus, beetroot, lettuce, endive, cauliflower, broccoli, beans, Brussels sprouts, carrots, peas, cucumbers, cabbage, pumpkins, sweet potatoes, rhubarb, radish, celery, sweet peppers, spinach, corn (mealies) and sweet corn, spinach beet, brinjals, tomatoes, garlic, broad beans, onions, leeks, shallots, runner beans; does not always have to be bought from the supermarket. The aim here will be to cover all these vegetables over a period of time so that although a small start is recommended for the home vegetable garden, in time one can develop a vegetable patch for fully sustainable vegetable gardening that can fulfill all the vegetable needs of the average family.
This section will look in depth at vegetable gardening and vegetable cultivation, from winter vegetables and summer vegetables to perennial vegetables as listed below.
WINTER VEGETABLES
- Beetroots
- Borekole
- Broad beans
- Cabbages
- Carrots
- Cauliflower
- Kale
- Lettuce
- Onions
- Peas
- Spinach
- Spinach Beets
- Swiss Chard
SUMMER VEGETABLES
- Aubergines
- Brinjals
- Corn
- Cucumbers
- Egg plants
- Gem squash
- Parsnips
- Peppers
- Potatoes
- Pumpkins
- Tomatoes
PERENNIAL VEGETABLES
- Asparagus
- Horseradish
- Rhubarb
Starting a Vegetable Garden

A newly planted strawberry seedling
When planning a vegetable garden you need to meet a few basic requirements. These requirements are: selecting the right spot, having the right equipment, laying out, sowing and planting the vegetable garden, and feeding the soil together with nurturing the seed and the consequent seedlings.
Planning a Vegetable Garden
Selecting the vegetable garden site
When choosing an appropriate site for your vegetable garden it is best that, as a beginner vegetable gardener, you choose a spot that get full sun during the day. Morning sun and afternoon shade is the best for vegetable cultivation. Although you should not fret because any piece of ground in any place can be utilized. Any spot in your backyard, patio or even on your balcony would do. Important to keep in mind is that all plants require sunlight, light and air. Sunlight is important for the formation of chlorophyll and the manufacturing of carbohydrates by the leaves. Thus it would be wise to not have your vegetable garden situated right adjacent to your house or even under a big tree which might have a very wide canopy. You might end up with too much shade and too little air and your vegetables will have to compete with the stronger root system of the tree. Air is mportant to combat the conditions that make fungal growth and its related diseases thrive. Try to avoid damp spots such as an area near to a down pipe.
The vegetable garden layout
Do not be too ambitious in the beginning. Start with a small vegetable garden as you will soon find that even the smallest of spaces can yield an enormous crop of fresh vegetables. With clever planning you will save both time and effort. You can even manage to make your vegetable garden a focal point in your garden. The interesting foliage and color of the vegetable plants can make for attractive focal points. The lovely dove-grey foliage of Jerusalem Artichokes can be very beautiful. The serrated leaves and blue almost purple brushes and the light green with the dark red lined new rosettes that form when growing vegetables and salads such as lettuce, beets, spinach, Swiss chard and the cure little Brussels sprouts can all make for an unusual focal point especially when it is grown in combination with companion plants such as herbs, Nasturtiums, Marigolds, Petunias, and the like. The size of your plot will obviously determine the design of your vegetable garden. With a small area you will probably benefit more by integrating your vegetable garden with the flower or main garden. In a big garden, your vegetable garden can either form one room in your garden design or the focal point of the garden. With little or no space as is the case with living in an apartment building and you are fortunate enough to have a balcony then a container vegetable garden would be ideal. Many vegetables lend themselves to growing successfully in containers. Container vegetable gardening can include lettuce, carrots, beets, radish, beans, potatoes, sweet potatoes, tomatoes, certain types of pumpkins, strawberries, etc. These can also be grown quite successfully in a small vegetable garden.

The vegetable garden layout design
Some examples of vegetable garden layouts can be: square, long, rectangular, L-shaped and even round. With a circular or round and even a square vegetable bed it is advisable to plant the bigger, taller vegetables like mealies (corn, Zea maize) beans, brinjals (eggplants), rhubarb or even gooseberries in the centre so that it does not intervene with the sunlight and air circulation of the other smaller vegetables. Then plant vegetables such as tomatoes and spinach, potatoes, onion, celery, broccoli around the taller vegetables. Follow this circle with smaller vegetables such as beets, carrots, cabbages, mint or lettuce.
With a long vegetable bed the bigger vegetables can be planted in the middle row with the medium height vegetables in rows on either side of these bigger vegetables and the rows right at the back and the front can be occupied with the smaller vegetables.
With an L-shaped vegetable bed the same principles would be valid except that the vegetable bed would be in two parts. In the event of your vegetable garden being against an incline or a fence, then the tallest vegetables should preferably be planted against the back fence with the smaller vegetables in front of them and the smallest right in front.
Make sure that you have the right equipment such as: a machete to clear the soil, a spade or shovel to work the ground, a fork to work the ground if the soil is clayey or stony, a hoe to draw soil up to the plants and remove weeds, a rake to break up clods, a watering can to wet and water the vegetables without damaging them (this is especially important in the case of small plants), and of course a wheelbarrow to transport your manure and compost, etc. other important equipment includes garden gloves, rubber boots, an old mat to kneel on when necessary, and a hand fork and hand-spade.
Soil Preparation for the Vegetable Garden
Before you can commit your seed or seedlings to the soil in your vegetable garden, it is essential that you ensure that the nutritional base of the soil is of such a nature so as to provide optimum results for the vegetable growth. You can accomplish this by preparing and feeding the soil before you plant the vegetable garden. If your soil is clayey, sandy or loamy you will need to make certain preparations. Do make the required soil amendments to ameliorate the garden soil.
First you need to remove the grass, bushes and trees and their roots from the ground you have chosen to use as your vegetable garden area. If necessary you could fence in the area if you have pets that also love to do 'gardening'. Now you can start with the preparations of the vegetable bed:
- A standard vegetable bed is usually about 4m long by 50cm wide (160 inches long by 20 inches wide). The length of your vegetable bed can vary according to your specific requirements. (TIP: Do not make the beds too wide because then you will have to stand in the beds to do maintenance work in your vegetable bed.)
- Leave a pathway of approximately 30 cm (12 inches) between the beds to accommodate working between the beds.
- It is preferable to have the vegetable beds running north – south to ensure that the plants will get more sun to grow well.
- Work some fertilizer or compost and superphosphate, or phosphate in the form of bone meal or blood meal, into the soil. Use approximately 4 to 8 spades of compost per square meter and about a handful of superphosphate per square meter if you use the chemical fertilizer.
There is also the matter of deciding on whether to grow your own vegetables from seed or seedlings. The cheapest would be to buy seed as there are so many varieties available from supermarkets, nurseries and garden centers. You are then free to choose the variety that will suit your area and soil type. However there is always the small hassle of seed that might have stood too long on the shop shelf and may thus not germinate or develop stunted growth. The best way to handle this type of situation is then to buy seedlings from a reputable nursery to start off your vegetable home garden.
After the first season of planting and harvesting there is nothing that should prevent you from harvesting your own seed. It is far more rewarding to harvest your own seed by the end of the growth season. Always choose the strongest plant which rendered the best harvest for seeding purposes. Store the seed in an airtight dark, container to stay fresh for the next planting season. Seed can be kept for up to 2 years. After the two year period it is best to harvest fresh seed or to buy new seed.
When sowing vegetable seed make sure to follow the instructions on the seed packet closely as it will provide you with tips on how deep to plant the seed, when the vegetable seed will germinate and when to harvest the vegetables.
Nurturing the seedlings
Growing seedlings is not a hassle. There are many commercially available seedling trays, but these can be quite expensive. To save money you can also make use of egg trays, or shallow disposable ice-cream containers or yoghurt cups, or whatever suitable containers you can find as part of the kitchen waste. Just punch a few holes in the bottom of these containers and you have a gratis seed-tray. Make use of seeding soil which is also available from nurseries and garden centers, or to keep costs ultra low, use two parts normal garden soil, one part compost and a couple of handfuls of river sand to aid in drainage. For best results sift the soil to get rid of loose stones and loosen the clumps of soil that may be left. Take care to sow the seed as evenly and as thinly so as to prevent overcrowding in your seed tray. (TIP: Shake a few seeds into the palm of your one hand and use your thumb and forefinger of your other hand to dribble the seeds in a row.) Keep the soil moist and warm and sheltered. When watering take care not to flood the seed or seedlings. Push the seeds down slightly with your finger and then smooth and firm down the soil. After planting the vegetable seeds water carefully with a watering can that has a fine nozzle. Water every second day (in hot areas every day) until the vegetable seeds germinate.
Once the seed have germinated reduce watering to three times a week. For good growth water the little seedlings with liquid fertilizer for two weeks after germination and then one a month after that. Once the seedlings have grown to the appropriate size then a kitchen spoon is sufficient to take out the little seedlings together with a little clump of soil to facilitate transplanting the seedlings into its rightful vegetable beds. Then all that is required is to grow and nurture the plants as is necessary for the specific type of vegetable, and soon you will be able to harvest fresh vegetables.
General tips for beginner vegetable gardening
- Select a sunny spot – morning and afternoon shade is best. Make sure that the patch is reasonable level.
- Start small – do not be over ambitious in the beginning. The space the size of a large door will yield an amazing amount of fresh vegetables. If you have no space at all make use of containers on your patio or balcony.
- Feed the soil – be generous with compost when you prepare the beds for the vegetables. Composting will improve drainage in clayey soil and increase water retention if you soil is too sandy.
- Seed or seedlings – sowing from seed is cheaper and you can pick particular varieties. If you want to kick start your home vegetable garden when buy vegetable seedlings from a garden center or reputable nursery. Just check that the seedlings are healthy and disease free before purchasing them.
- Start with one or two varieties – it will be easier to manage than planting too many as you might find yourself running out of time and enthusiasm.
- When choosing vegetables to grow in your vegetable garden make sure that they can be sown directly into the vegetable bed. This will not only save time, but for the beginner vegetable gardener this can be of great help as it will save you the effort of transplanting and possibly hurting your little seedlings.
- Do not sow all the seeds at once – rather leave space so you can plant a new batch every two to three weeks. Then you will extend you harvest.
- Store your seeds in your kitchen drawer – it has sufficient darkness to keep your seeds fresh. Seal the seeds in an airtight container in the drawer.
- Alternate root and leaf vegetable crops in the same bed as it will help to restore nutrients to the soil.
- Vegetables such as spinach, lettuce, spring onions, cherry tomatoes, radishes and sweet peppers and hot chili peppers will grow in containers – be sure to make use of a good potting soil mixture and feed often with liquid fertilizer for best results.
Vegetable Gardening and Crop Rotation
In the event of the same type of vegetable or related vegetable crop being planted on the same site season after season, it is only logical that the same type of nutrients will be taken out of the soil. Consequently you will find that your vegetables will become vulnerable to the same type of diseases and growth will diminish over time. Many diseases and pests are plant-specific.
Crop rotation is the method whereby different vegetable crops are planted in the same site as the seasons follow. In this way the soil in your vegetable garden can be replenished and you will also diminish the pests and diseases that may attack your vegetable crops by restricting their food supply and good conditions wherein the diseases may thrive.
On the whole vegetables can be grouped according to the family, species or type where they belong. These groups are as follows:
- The Cabbage family (Brassica): cabbage, cauliflower, Brussels sprouts, turnips, kohlrabi, radish and broccoli.
- The Potato family (Solanum): potatoes, tomatoes, chilies, brinjals (eggplants) and even goose berries.
- The Cucumber family (Cucurbita): cucumbers, watermelon, cantaloupe (sweet melons), pumpkins, squashes, butternuts, marrows and patty pans.
- The Onion family (Allium): onions, dill, spring onions, garlic, leeks and shallots.
- The Carrot/Root family (Umbelliferae): both yellow and white carrots, beets, beetroot, fennel, parsley and mint.
- The Leafy family (Compositae): lettuce, endive, all types of lettuce and chicory.
- The Legumes (Leguminosae): all peas and beans.
General tips for practicing vegetable crop rotation
- Do not cultivate the same or related species for two consecutive seasons on the same site in your vegetable garden.
- Do not plant vegetable crops with big root systems continually on the same site.
- Root vegetable crops will thrive in light soil and not rich soil. It is thus advisable to plant root crops after vegetable crops such as chilies, tomatoes and brinjals (eggplants) which are all heavy feeders.
- After harvesting vegetable crops such as cabbages, cauliflower, broccoli and Brussels sprouts it is advisable to rotate with legumes such as peas and beans to improve the nitrogen content of the garden soil.
There are some gardeners that do not practice crop rotation and still get away with a healthy vegetable harvest time after time. Though crop rotation makes sound sense, it needs to be understood to be fully workable. If you fertilize your vegetable garden soil correctly there is no nutritional benefit in rotating crops. You may argue that vegetables of the legume family will contribute greatly to the nitrogen content that was extracted from the air in the soil, which will benefit the next crop. There is no denying this, BUT a handful of LAN (Limestone Ammonium Nitrate) fertilizer can also make up for the difference in nitrogen content. On the other hand leguminous vegetable crops are eelworm susceptible and if you follow the legume vegetable crop with the same type of crop or even a crop that is also susceptible to eelworm infestation, the results can be devastating. For example planting carrots as the follow up crop for beans can be disastrous. It is thus imperative that you should rather consider soil-borne diseases and pests and not nutrition when you want to practice vegetable crop rotation. On the home vegetable gardening front it is mainly eelworm that attack ones vegetable crops. A good organic soil that has the optimum aeration level and a sufficient amount of beneficial organisms to counter pests and diseases is always the basis for a successful vegetable crop.
Beetroots (Umbelliferae – Beta vulgaris)
There are few things prettier than a beetroot with its dark red stems and bright green leaves that resemble beautiful umbrellas with dark red lacework on the edges. As a vegetable the beetroot is attractive enough to earn its place as a huge asset in any type of garden. Just imagine how eye-catching the display if you plant Marigolds next to your beetroots - the Marigolds with its bright yellow blooms and the bright red foliage of the Beetroots. What is more is that the swollen root is eaten as beetroots and the leaves are eaten as spinach. No kitchen garden would be complete without a beetroot plant. The rewards of growing beetroots are plenty and depending on how you have sown your beetroot seeds and how you nurtured the beetroot plants you can harvest practically right through the year.
There are many varieties of beetroots such as the Crimson Globe, the Detroit Dark Red, the Cylindra and the Formanova that can be cultivated in the home vegetable garden.
The Crimson Red and the Detroit Dark Red beetroot will do equally well in a container garden if you find yourself short of space.
Nutrients in Beetroot
Beetroots, that are the round bulb itself, do not have high vitamin content, but it more than makes up for this deficiency in the amount of sugars that it contains. The types of vitamins that one does get in beetroot leaves are vitamins A, C and B6. Apart from the sugars contained in beetroots, the leaves of the beetroot plant are rich in iron, magnesium, potassium, phosphorus, manganese as well as folic acid.
How to grow Beetroot
Where and when to plant your Beetroot
Beetroots is a cool weather vegetable crop and will grow any time of the year as long as the moisture content of the garden soil is kept constant. Beetroots are not sensitive to heat; they are resistant to cold but will grow at a slower rate during winter. Any soil type will support beetroot growth, but it is preferable to make use of deep crumbly rich soil - rich in the sense that the garden soil should be amended with organic materials such as compost to ensure a superior vegetable crop. Hard compacted soil like clayey soil should be avoided since it will hamper root development.
Beetroot plants will do well in garden soil where Brassicas such as cabbages or Brussels sprouts have been cultivated and are ideal for crop rotation with these crops. Thus do not hesitate to sow your beetroot seeds in that soil. As long as you keep the top soil moist and have added a spade depth worth of good well-rotted compost or manure.
Prepare the soil by working in the compost and wetting it thoroughly. Allow the garden soil to stand for a day or two. Then ensure that the soil is evenly moist by checking it with a garden fork.
How to sow your Beetroot seeds
As is indicated on our sowing guide, beetroot seeds can be sown at practically any time of the year and almost anywhere except in winter in cold areas and in summer in sub-tropical areas. The beetroot seeds should be sown in a sunny position in your garden in drills that are ½ inches (1 ½ cm) deep and 18 inches (20 cm) apart. Alternatively sprinkle the seeds thinly in the garden bed and lightly rake over sufficient garden soil to cover the seeds. Then set the sprinkler to a gentle setting over the area where you have sown your beetroot seeds. During the germination period you should endeavor to keep the garden soil moist and shaded. Make use of mulch to help prevent the area from drying out.
It is best to sow the beetroot seeds in situ because transplanting is not recommended. One can rather thin out the seedlings at a later stage after germination.
Sow the beetroot seeds as deep as the first joint on your index finger and cover the seeds firmly with a layer of garden soil.
If you are growing your beetroots in containers then you should ensure that the container is at least 1 ft (30 cm) deep and you should plant the beetroots approximately 3 inches (7 ½ cm) apart.
Taking care of your Beetroots
Keep the soil moist until the seedlings appear. The beetroot plant is a shallow root plant and as such it should not be neglected to the point of drying out. You must make sure that the top 1 ft (30 cm) of garden soil where the beetroots are planted is always moist. Make use of mulch for this purpose.
Give your beetroots a helping hand by feeding the garden soil with a desert spoon full of Limestone Ammonium Nitrate (LAN) and watering it in four weeks after you have sown the beetroot seeds to ensure a good beetroot crop. Be vigilant for plant diseases and pests that may inflict themselves on your beetroot plants. If any pest or disease is detected treat immediately.
When thinning out your beetroot seedlings you should strive to have between 50 and 60 beetroot plants per square meter. Do not waste the thinned-out beetroot plants. Use them to eat as baby beetroots and eat the beetroot leaves as tender spinach. After thinning out the beetroot seedlings, the ones left in the soil to mature should preferable be a hand width apart.
Do weeding on a regular basis, especially when the beetroot plants are young.
If necessary make the necessary soil amendments to ensure that there are sufficient nutrients in the garden soil to ensure a good beetroot crop.
How to harvest your Beetroot crop
The beetroots can be harvested approximately between 6 to 8 weeks after sowing the beetroot seeds. By then the beetroots should be 2 inches (5 cm) in diameter.
After pulling out the beetroot, twist the tops, i.e. the leaves, off the root.
Take care not to damage the root. DO not cut off the leaves. Rather wring it off.
Beetroots are tastier and cooks softer the earlier it is harvested.
Troubleshooting Beetroot crop failure and growing pains
Beetroots are misshapen
Odd shaped beetroot could be the result of the garden soil being too clayey or too compact. Plant the beetroots in organic crumbly loamy garden soil to avoid misshapen beetroots.
Beetroots bleeding and losing its color
The incorrect harvesting of the beetroots could result in the beetroots bleeding and losing its color. When you harvest your beetroots, you should not cut off the leaves but rather twist the top off the root.
Beetroot seedlings wilting and falling over
Beetroot seedlings tend to wilt and fall over as a result of cutworms attacking your beetroot seedlings. Be vigilant cutworms and keep them and other pests at bay.
Brinjals, Egg plants, Aubergines (Solanaceae - Solanum melongena)
How about putting purple in your garden – edible purple vegetables that is? Brinjals have originated from the Solanum insanum and the Solanum incanum. Brinjals are probably one of the most popular of vegetables with every country having its own particular way in which the people prepare them for eating.
Brinjals are cultivated and eaten in most parts of the world. In France it is used in ratatouille, in Italy in fritters, in Indian curries, and eaten with tomato and cheese in many Mediterranean countries. Brinjals are probably the vegetable that will never lose its popularity. For a superb health boosting supper dish you could always try a Brinjal stir-fry. (See recipe below.)
The Brinjal grows very easily and is a very low maintenance vegetable to cultivate. They are an asset to any garden and make excellent accent plants because of the pretty purple flowers and bright, shiny, black fruit, contrasting with the green foliage. About half a dozen of Brinjal plants should provide enough for the averaged size family.
Brinjals are related to the tomato, chilies and potatoes and have similar garden soil and climatic condition requirements but needs a longer growing season.
Nutrients in Brinjals, Egg plants and Aubergines
Brinjals are rich in Calcium, Phosphorous, beta carotene and Potasium and also serves as an excellent source of vitamin C, iron, niacin and folate. As part of the diet, Brinjals can be used to combat health conditions such as cholesterol in that it will protect the arteries by clearing the blood, preventing strokes and hemorrhages and it also strengthens the vein walls.
How to grow Brinjals, Egg plants and Aubergines
Where and when to plant your Brinjals, Egg plants and Aubergines
Brinjals will thrive in warm weather conditions and cannot stand the cold. Also Brinjals have quite a long growth season. In tropical areas that boast warm winters one can sow brinjals from seed during winter. Just bear in mind that brinjals are summer vegetables and you need to sow your brinjal seeds taking into account the long grow season that is required for the successful cultivation of homegrown brinjals.
Brinjals will grow in a variety of garden soils but it is advisable to make use of well-drained loamy or sandy loamgarden soil.
When preparing the soil for your brinjal plants it is advisable to use soil that is only slightly acidic, that is garden soil that has a pH of between 5.5 and 6.5. If necessary make the make the appropriate soil amendments to accommodate the cultivation of brinjals in your garden soil. Dig into the garden soil about a spade depth and mix the top garden soil with a little compost and about two cupfuls of superphosphate per square meter. Work these through the garden soil and place the top soil back into the bed that you are preparing for the brinjal seedlings to be transplanted in.
How to sow your Brinjal, Egg plant and Aubergine seeds
It is recommended that you sow brinjals in seed beds or seed trays if you are a beginner vegetable gardener. Do bear in mind that some of the brinjal seeds may just happen to be an empty shell; these brinjal seeds are usually darker in appearance. (TIP: Sow more seeds than you intend planting to compensate for the empty-shelled brinjal seeds.)
Sow your brinjal seeds about fingernail depth and a hand width apart if you are sowing more than one row of brinjal seeds. Use a watering can to water the brinjals seeds thoroughly after sowing. Brinjals seeds take about ten to fourteen days to germinate.
After germination the brinjal seedlings will require a further five weeks in the seed trays before they can be transplanted. In those five weeks the brinjals seedlings would have grown as high as the knuckle of your index finger. At this stage the brinjal seedlings is ideal candidates for transplanting into a garden bed or even a container, depending on where you plan on cultivating your brinjals.
Plant the brinjal seedlings slightly deeper than it stood in the seedbed or seed tray where you are transplanting them from.
Taking care of your Brinjals, Egg plants and Aubergines
Your brinjal plants will thrive if you dress them with a liquid manure or a compost tea every three weeks during their growing season.
Always water in the fertilizers and additional nutrients after they have been applied to the brinjal plants in the garden soil.
Water your brinjal plants regularly and do not be afraid to be the organic gardener, make use of mulch in and around the brinjal beds.
Be vigilant for pests such as cutworm and snails and keep weeds to a minimum.
Do not hesitate to stake your plants as the brinjals can become quite heavy.
Provide adequate protection for brinjals against hail and frost damage.
How to harvest your Brinjal, Egg plant and Aubergine crop
Upon maturity brinjal fruits can grow quite large in comparison with other vegetables that also belong in the same family. Once your brinjal fruit reached a diameter of approximately four to five fingers, you can pick the brinjals. You can expect anywhere between ten to twelve fruits per plant in your harvest. This is obviously dependent on how well you cared for your brinjal plants while they were growing and whether they grew well.
Always use secateurs to cut off the brinjals when harvesting. The brinjals can be harvested when the fruits are still glossy. Do handle your home-grown brinjals with care as they bruise easily. Once picked, the fruit should not be stored too long.
The brinjal fruits do not have to be fully grown to harvest. Test the brinjal with your finger and if it gives just a little and it has filled in good and is shiny, then by all means, you may harvest your brinjals. Usually after about three months or twelve weeks.
Harvest the brinjals regularly. The more you harvest brinjals the sooner more fruit-bearing flowers will develop. The young plants provide the most bountiful crop.
Troubleshooting Brinjal, Egg plant and Aubergine crop failure and growing pains
Brinjals, Egg plants or Aubergines way too small when matured
Snip out the growth points and the excess of the flowers that forms to produce quality brinjals instead of quantity.
Brinjals, Egg plants or Aubergines not available long enough
You may harvest brinjals anytime (depending on the weather conditions and consequent growth) from the twelfth week after transplanting them. Harvesting can occur over several weeks. However do not wait too long to harvest else the brinjals may become overripe and bitter.
Brinjals, Egg plants or Aubergines too few
Brinjals should preferably be planted as an annual as the new plants are the best performers when it comes to providing many fruits. You plants may be a bit too old to be prolific providers.
Brinjal, Egg-plant or Aubergine Stir-fry
This recipe is enough to serve three to four people.
- Sprinkle a fresh, thinly sliced brinjal with a little salt and allow to stand for about half an hour.
- Rinse the brinjal and pat dry.
- Lightly fry the brinjal in a large cast iron pot or a wok.
- Then add:
- 1 cup of finely chopped onion.
- 1 clove of finely chopped garlic.
- 1 cup of thinly sliced mushrooms. (The button mushrooms works excellent.)
- 1 and a half cup of finely chopped, peeled tomato.
- 1 cup of chopped celery.
- Half a cup of chopped parsley.
- 2 teaspoons of fresh thyme.
- 1 teaspoon of ground coriander.
- 2 teaspoons of honey.
- The juice of one lemon.
- Black pepper and salt to taste.
- Stir-fry briskly for about five minutes and serve with a crostini or ciabatta bread.
Carrots (Umbelliferae - Daucus carota)
Carrots are commonly available vegetables and in many cases it is taken for granted. However, if we stop to think a bit about carrots then we can truly be astonished at this little powerhouse. Carrots are packed with nutrients, anti-oxidants, and beneficial qualities. Carrot origins can be traced to the Afghanistan region as far back as 2 800 years ago. The carrots of yesteryear were very different to the ones we get today. In fact many of the available carrot varieties were bitter, more fibrous and were regarded mainly as medicine and not so much as food. They were small, thin and came in many colors ranging from purple, orange, and yellow to red, as well as from black to white. The orange carrots that we have today owe its color to Dutch politics. In the sixteenth century yellow and red carrots were crossed to create the color of the House of Orange. The yellow carrots from North Africa and the red carrots from the East were used in this crossing to honor the House of Orange.
Nutrients in carrots
All carrots are rich in Vitamin B, Vitamin C and calcium pectate, all which have cholesterol lowering properties. The Calcium in carrots is easily absorbed into the blood stream. Carrots also have high levels of potassium, folic acid as well as magnesium. Folic acid is required to enable the body to absorb iron. In additions, the different colors in carrots are indicative of the different levels of nutrients that carrots contain.
- Red carrots have a high lycopene content.
- Orange carrots have a high carotene content.
- Purple carrots have a high anthiocyanin content.
- Lycopene, carotene and anthiocyanin are antioxidants, the cancer fighters.
How to grow carrots
Where and when to plant your carrots
Carrots make excellent companion plants to radish, pea, lettuce, tomatoes and onions. To combat garden pests such as white fly planting onions as a companion plant makes perfect sense. With Sage growing in the background you cannot go wrong when cultivating carrots at home in your garden.
As indicated in our sowing guide, carrots can be sown during spring, early summer and autumn. If you live in a sub tropical area then you should restrict your sowing time to the cooler periods of the year.
Carrots prefer to grow in light sandy garden soil that drains easily. If you happen to have clayey garden soil then it is recommended that you add organic content to the garden soil approximately 3 or more weeks before sowing the carrot seeds. Carrots will struggle to grow in clayey soil. Dig about a spade depth into the garden soil. Loosen the soil with a garden fork and work in about a 3 cm (1 inch) layer of compost. Further preparation of the vegetable bed for carrots should preferably include a handful of super phosphate (in the form of either bone meal of blood meal is best) and approximately one desert spoon of 3:1:5 per square meter.
How to sow your carrot seeds
Take care never to sow carrots into a newly composted bed as it will result in carrots with distorted root systems and distorted shapes. Wait till about 3 weeks after composting your garden soil to sow the carrot seeds.
Carrot seeds germinate slowly. You will probably wait between 10 and 14 days before you will notice any of the carrots seeds coming up. You should water the garden soil regularly and shade the bed to conserve moisture if necessary.
If you want to ensure that you can harvest carrots right through the year you should sow one row of approximately 2 m in length every three weeks. Remember that the carrots will take longer to grow in the colder months. (TIP: Just before winter you should sow more carrots than you usually sow during the summer months)
Sow the seed a bit thicker in the winter months.
Taking care of your carrots
Always keep the soil moist but not wet or flooded. Furthermore keep the garden soil free of weeds and pests such as snails and slugs.
Since the carrot seeds lie very shallow in the garden soil, shade is of the utmost importance. Shade can be provided by placing a shade net over the area. Alternatively you may also use a wet bag. As soon as the seeds germinate remove the bag, but keep the soil moist (not wet).
When your carrot seedlings have grown to about three leaves per seedling, then you should fertilize them with some LAN (Limestone Ammonium Nitrate). Take care not to let any of the LAN fall on the leaves. Water the fertilizer in.
When you carrot seedlings have grown to about 6 leaves per seedling then fertilize them with 1:0:1 fertilizer and water it into the garden soil. Again take care not to let the fertilizer fall on the leaves as it may burn the leaves.
After eight weeks you can also add some potassium sulphate (approximately 1 teaspoon per square meter) to add deeper color to the carrots.
Repeat fertilizing with the potassium sulphate every two weeks until you harvest the first carrots.
Thinning out the seedlings is important when cultivating carrots.
How to harvest your carrot crop
It depends on the type of carrot that you are cultivating, but in general carrots can be harvested from the eighth week.
When harvesting your first carrots you should orchestrate it in such a way as to double-task as thinning.
Give the carrots a generous watering after the harvest.
It is best to leave the carrots in the ground rather than to take it out of the garden soil and storing it somewhere else. The carrots will keep its shape and flavor so much better if left in the garden soil and harvested just as required. It is also much more nutritious. In winter it can take up to twenty weeks for carrots to grow to maturity and in this time you can harvest as you require carrots.
Troubleshooting carrot crop failure and growing pains
Carrots growing into strange shapes
This problem is mainly due to eelworm infestation. Eelworms tunnel into the roots of plants and cause restrictions in root development. Eelworm infestation thus results in carrots being misshapen, forked and with lumpy roots. Combat eelworm infestation by increasing the organic content of your garden soil. By building up the organic content in your garden soil you can eradicate eelworm in your soil.
Carrots cannot grow long enough
Carrots have huge root systems and need to use their roots to develop long carrots. You must ensure that the taproot of your carrot seedlings will not come up against hard or impervious layers in the garden soil. You should till the soil deeply. Now deep tillage does not necessarily mean that you have to turn the garden soil to maximum depth. Just push the garden fork to its full depth and tilt slightly to break up the layers of garden soil. Deeper roots will result in longer carrots with better color and quality because it can then absorb nutrients and moisture way beyond the reach of other vegetables.
Carrots short and stumpy and seem too thirsty
Irrigating carrots can be problematic. Often gardeners provide frequent light irrigations rather than a weekly soaking. Light irrigations result in short, stumpy carrots which also translate into a waste of water, encouraging disease and limiting the root system from developing properly. Carrots prefer less frequent, very heavy irrigationas the roots progress down the garden soil.
General carrot crop failure
Since carrots are deep rooted vegetables you will get a better vegetable crop if you dig over the garden bed to a good depth for the carrot cultivation. Compact layers of garden soil will result in short roots, resulting in short carrots and even crop failure. With better soil preparation you can prevent a possible carrot crop failure.
An unacceptable size carrot
When a vegetable crop is planted too dense it can result in carrot crop failure: - like all other plants, carrots are affected by the amount of sunlight that it is exposed to. The amount of sunlight received by the plants limits the number of carrots that you can fit into an area. Carrots are not limited by the space occupied by the roots. By planting the carrots too close together, you are actually creating weeds. You should preferably thin out the carrot seedlings to between 50 and 100 carrots per square meter. (TIP: The best density to strive towards is 80 plants per square meter and thinning it out to about 50 plants per square meter.) Thinning out of carrots should occur at the four leaf stage. The big misconception in carrot cultivation is that most gardeners believe that carrots merely need to be spaced to the width in all directions. The major limiting factor in carrot cultivation is sunlight and not necessarily garden soil space. To get a suitable, acceptable carrot the plant should be exposed to a specific amount of sunlight.
Cauliflower (Brassicaceae – Brassica oleracea)
Cauliflower a vegetable fit for royalty. If ever one happens to grow a cauliflower in a home garden, then one can truly say that one has a home vegetable garden because a cauliflower is one of the most difficult vegetables to cultivate successfully. In the event of the smallest, minutest error, one can be left with a cauliflower that is so tiny that the curds are lost in the leaves. Cauliflowers are more difficult to grow than the other vegetables in the Brassica family. These other vegetables include the cabbages and Brussels sprouts as well as the Broccoli. Cauliflowers do not like heat, and should never be allowed to dry out and temperature fluctuations should only be moderate. Cauliflowers are greedy feeders and constantly require Nitrogen and detest strong wind. Cauliflower is also quite finicky when it comes to pH levels of garden soil. Cauliflowers prefer a pH of 5.5 to 6.5. In fact it is essential to cultivate your home grown cauliflower crop in the second half of summer so that harvesting can occur in early winter since cauliflowers are a cool season crop. It is worthwhile to grow cauliflowers once a year, but it is not worth the time and effort of the home vegetable gardener to grow cauliflowers out of season.
Many cultivars of cauliflowers have been developed over the years and these days the Australian varieties such as Wallaby and the Snowball which is very adaptable to various conditions. The Wallaby cauliflower even allows for out of season cultivation. Other cultivars include the Boomerang, the Canberra, the Early Erfurt, the Snowcap and the Southern Cross.
Do not be scared to introduce cauliflowers to you flower garden as the cauliflower makes an excellent companion plant to Petunias and Nicotianas. The Petunias and Nicotianas will act as a resilient and tough pest deterrent and the cauliflowers will not only look pretty, it will reward you with a wonderful crop to harvest.
Nutrients in Cauliflower
Cauliflowers are filled with antioxidants and are sometimes referred to as nature’s antioxidant. Very high levels of vitamin C and folate as well as dietary fiber can be found in cauliflowers.
Often cauliflowers are included in a diet to treat ailments such as anaemia, asthma, biliousness, colds, constipation, gout and high blood pressure.
How to grow Cauliflower
Where and when to plant your Cauliflower
Cauliflowers prefer cool conditions because hot weather is bound to hamper good head formation and will probably result in the cauliflower heads going to seed before they have reached a decent size. Prepare you seedbeds by working in some organic compost such as bone meal or superphosphate and 3:1:5 fertilizer. The best ratio of compost to use is two parts garden soil, one part organic compost, one part of river sand. Cauliflowers will thrive in rich, well drained garden soil with the occasional organic compost such as bone meal or superphosphate, added to the 3:1:5 basic dressing.
How to sow your Cauliflower seeds
It is recommended that you sow you cauliflower seeds in seedbeds, preferably under a shelter. Sowing of the seed itself should be done in furrows of about a finger nail’s depth. Cover the cauliflower seeds with a thin layer of soil.
When sowing the cauliflower you should make sure that the seedbeds are about an adult’s hand width apart. Water the seedbeds thoroughly after sowing. Thereafter you must ensure that the seedbed does not dry out. Water regularly and weed regularly to provide your cauliflowers with the optimum of conditions in which to thrive.
The transplanting of your successfully germinated cauliflower seedlings: In the event of you cultivating your own cauliflower seedlings from seed it is imperative that you have to transplant your cauliflower seedlings after it has germinated and grown to the desirable height. Cauliflower seedlings are usually ready after 5 to 6 weeks from sowing time. At this time the cauliflower seedlings would be approximately the height of your index finger (say 10 cm). If you leave your seedlings in the seedbeds too long, then they will become unproductive.
Water the seedbeds thoroughly before transplanting your cauliflowers. Remove your cauliflower seedlings with the garden soil in which they germinated. If the cauliflower seedlings are pulled out by the stem they can easily be damaged.
Ensure that you space the rows 2 to 3 feet (60 to 90 cm) apart; and 18 to 24 inches (45 to 60 cm) between the cauliflower seedlings itself when transplanting them. Strive to keep the garden soil moist and it is advisable to transplant you cauliflower seedlings in the late afternoon when it is cooler.
Taking care of your Cauliflower
Keep the cauliflower plants healthy by protecting it against pests and diseases and provide them with sufficient water. Make use of a good mulch to keep the garden soil cool and moist around your growing cauliflowers. The mulch will also help with controlling the weed population.
Cauliflowers are heavy feeders and you will need to apply a top dressing every 3 to 6 weeks after you transplanted your cauliflower seedlings. You may also make use of a liquid fertilizer for this purpose. This liquid fertilizer can consist of Limestone Ammonium Nitrate (LAN).
Try to keep your cauliflower heads out of the sun while it is growing. The sunlight may discolor the cauliflower heads. Take the outer leaves of the cauliflower plants and crack them in the middle and fold it over the developing cauliflower heads. Do this when your cauliflower heads have grown to about 5 inches (15 cm) in diameter.
How to harvest your Cauliflower crop
Cut off the cauliflower head when they are fully developed, that is, the correct size, the proper shape and texture. The cauliflower heads should be cut off before branching occurs.
In general it is better to harvest your cauliflowers too early than too late because over ripe cauliflower heads will wilt after harvesting. Harvesting time can be anywhere between 2 to 5 months depending on the variety of cauliflower that you sowed.
Troubleshooting Cauliflower, crop failure and growing pains
Cauliflowers are small and bolting
This usually happens when you plant cauliflowers out of season. In nature as much seed as possible is produced by forming a large curd in the correct season. However, if you happen to stress your cauliflower plants then it will panic and start to go into a premature productive phase to produce seed at all cost and leaving you with small, pre-maturely bolting head of cauliflowers of poor quality. Keep the cauliflower healthy, well-watered and well-fed sight up to harvesting time.
Cauliflowers are not white
This is a result of the growing, developing cauliflower heads being exposed to the sun. Crack the outer leaves of the cauliflower plant and fold them over the developing cauliflower head.
Cauliflowers do not stay fresh for long after harvesting
Your cauliflowers will stay fresher if you put it in a paper bag in your refrigerator.
Cauliflowers discoloring when it is cooked
Discoloring of cauliflowers can be prevented by adding a few drops of lemon juice when cooking.
Globe Artichokes (Asteraceae – Cynara scolymus)
Artichokes, or rather the globe artichoke is a thistle-like perennial that originated around the Mediterranean. It is a rather big but beautiful, architectural, ornamental plant / vegetable / flower and as such an asset to most home or even backyard gardens, regardless of the type of garden where it is planted and cultivated. Big because it can grow up to 2 meters tall, i.e. 3 to 4 feet tall. The leaves are arched, lobed and can be up to 90 cm long, i.e. between 1 and 2 feet. The plant itself grows quite wide as well so be sure to give the Artichoke sufficient space to grow to its full potential.
The flowerbuds of the artichoke are the actual edible parts which have a delicious, delicate flavor and are thus considered a gourmet vegetable. The flowers buds that forms develop approximately to about 8 – 15 cm in diameter with several triangular scales.
There are several varieties of globe artichokes that can successfully be cultivated in home gardens.
There are the green globe artichokes:
- Green Globe Artichoke which is incidentally a very popular variety that bears big green heads that can grow up to 4 inches in diameter. This globe artichoke variety also gets grown on a commercial basis from seed.
- Imperial Star Globe Artichoke with its mild flavor and prolific crop.
- The Symphony Globe Artichoke and the Harmony Globe Artichoke can also be grown from seed.
- The Camus de Bretagne Globe Artichoke and the Castel Globe Artichoke are also quite popular because it produces big green flowerheads and is best grown from vegetative propagation or ready-rooted suckers.
- Blanc de Oran Globe Artichoke, the Sakiz- and the Espanola Globe Artichokes are a medium-sized green variety that can also be cultivated successfully.
And there are the purple globe artichokes:
- Romanesco Globe Artichoke with its beautiful, big, purple heads.
- Violetta di Chioggia Globe Artichoke which also sports purple heads and tastes great.
- Violetta Precoce Globe Artichoke, Violet d’Algerie and the Baladi Globe Artichokes have violet coloured, medium-sized heads.
- The Concerto Globe Artichoke, the Opal- and the Tempo Globe Artichokes can also be grown from seed.
And of course the Spined Globe Artichoke:
- Spinoso sardo Globe Artichoke and the Criolla Globe Artichoke are also good varieties to cultivate in a home or backyard garden.
Nutrients in Globe Artichokes
If you are into healthy eating, trimming down, dieting, then Globe artichokes should be a must on your list of food. Globe artichokes are low in fat and loaded with fibre. It has a lovely, delicate, buttery flavour that makes it a slimmer's delight.
Not only do globe artichokes taste great, it is also of great value to your digestive tract. Due to the Globe Artichokes' fibre content, it acts as a laxative; it absorbs water and creates bulk to move 'unwanted' things along in your digestive tract. Globe artichokes also act as a source of folic acid which is an essential element in absorbing iron in the blood stream. This is important for women especially in times of pregnancy, as well as decreasing the risk of developing heart disease.
There is no cholesterol or saturated fats in globe artichokes. Globe artichokes can be considered a carbohydrate and a protein that has vitamin C, Dietary fibre, sodium, Folic acid, Iron, Magnesium, Manganese, Potassium as well as carrotenoids.
How to grow Artichokes
Where and when to plant your Artichokes
First and foremost, your soil preparation is of the utmost importance. Since Globe Artichokes are sun-loving plants you should plant them in a sunny spot with well-drained fertile garden soil. Though the spot that you choose to grow your globe artichokes should be open and sunny it does not mean exposed. Globe artichokes do not like frost or snow. In fact you should only consider growing globe artichokes if the area you live in enjoys a long, frost-free season with damp weather. Globe artichokes would even be more of a benefit at the back of a border due to its architectural, ornamental looks.
A whole load of special care and mulching would be of great value to successfully cultivating your globe artichokes.
If you are already making your own compost then growing globe artichokes organically should not be a problem.
Dig the planting site thoroughly, incorporating plenty of well rotted manure or compost and apply a dressing of general fertilizer such as blood- or bone meal or manure before planting. Thoroughly rake in the compost, or type of fertilizer into the garden soil to spread the nutrients evenly for the plant.
The best conditions to grow Globe artichokes would be in full sunlight and a rich, well-drained garden soil that will hold moisture.
How to sow your seeds and grow Globe Artichokes
If you intend growing Globe Artichokes from seed then our sowing guide should provide you with the most appropriate times when sowing should occur. When deciding to grow globe artichokes from seed then you should consider yourself advised of the following aspects.
- It is best to sow your globe artichoke seeds either indoors if the weather is frosty, snowy or cold OR outdoors if the weather conditions permits optimum opportunity.
- If you sowed you seeds indoors in containers then your seedlings will first have to grow strong before you consider planting them outdoors in the prepared beds.
- The young globe artichoke plants will have to be hardened off before planting them out.
- Globe artichokes grown from seed vary immensely. Globe artichoke cultivars will not usually come true from seeds because seed raised plants are variable in quality.
- It is quite a task to tell beforehand which plants will produce vegetables that are true to its cultivar until heads are produced.
- It can be a long process because once germinated and in seedling stage it still takes about 2 years for plants to mature to the point of bearing edible flower heads.
- On the other hand you should consider yourself well-advised to start growing globe artichokes by building up stock in following years by taking offsets from the best and throwing away the poor ones.
If you are starting out a new crop, or indeed your very first home-grown crop of globe artichokes then it is best to start with offshoots or suckers from a reputable nursery or garden center.
You should dig a hole in your prepared garden bed that is bigger than the sucker.
Then you should plant the sucker so that the soil mark on the stem corresponds to the depth of the hole.
Then you should fill the hole with soil, secure the plant firmly and water well.
If you would like more than one plant, then it is always a good idea to grow globe artichokes in groups in the home garden. Then the artichoke plants should be planted 60 cm (or 2 feet) apart and in rows that are 75cm (2,5 feet) apart. These measurements would work well for a medium sized globe artichoke plant. The bigger varieties should preferably be planted with a space of at least 1m (3 feet) each way.
But since these plants can produce anywhere between 12 and 24 flower heads per plant, per season, you should really limit yourself to the amount that would be sufficient for you and your family.
After you have successfully grown, and cultivated your first globe artichokes then you should start thinking of harvesting, not only the flower heads, but also suckers for your crops in seasons to follow.
You should take rooted suckers in spring. (Suckers are also known as offsets.) Globe artichoke suckers can be planted out in between February and April (or between July and September if you are in the southern hemisphere.)
How to take Artichoke suckers
- Scrape the soil away from the base of the healthy globe artichoke plant. Healthy plants that will produce suitable suckers are at least three years old.
- Slice down between the offset (sucker) and the parent plant using a sharp knife.
- Make sure that you leave the parent plant with at least three shoots. Do not cut off all offsets.
- Choose the offsets with as much roots as possible.
- Plant the globe artichoke suckers/offsets in well prepared, well-=draining, composted garden soil.
- The globe artichoke suckers should be planted at least 5 cm or 2 inches deep with a spacing of at least 1 meter or 3 feet between each plant, each way.
- Keep the newly planted globe artichoke suckers well watered and protected until they are established.
- Apply a liquid compost tea approximately 6 week after planting the globe artichoke sucker.
- Make liberal use of mulch to retain moisture in the garden bed where the globe artichoke suckers are planted. The mulch serves a dual purpose in that it will also suppress weed growth in the garden bed.
Taking care of your Artichokes
During the first season:
- Do not allow the globe artichoke plants to dry out until they are well established. Make sure that the plant is not at risk of drying you when it is hot.
- Do not allow weeds to take over the garden bed where the globe artichokes are planted.
- Keep the plants well watered in the first season.
- Protect the globe artichoke plants from strong wind.
- Ensure that you plant your globe artichokes in well-drained, well-composted garden soil.
- Make use of a liquid compost tea or seaweed fertilizer 6 weeks after you planted your globe artichokes.
- Make liberal use of a good quality mulch to retain moisture in the garden bed where the globe artichokes are planted.
- If your garden soil is a heavy soil then your globe artichoke plants will be susceptible to the cold. You should then earth up the base of the plant during autumn and cover the crown of the globe artichoke plant with straw to protect it. Even dead foliage of the plant itself can be used to good effect. You can remove these coverings at a later stage when you deem it appropriate and when the globe artichoke plant is not at risk.
- In its first year, plants need to put all their energy into making growth, so remove any flowerheads as they form. (TIP: This is important to remember when wanting to harvest your globe artichokes.)
In the second growth season:
- In early spring you should add a mulch of well-rotted manure to the globe artichoke plants to boost growth.
- Your globe artichoke plants will throw up several flower shoots. Each of the shoots will bear one large artichoke and several smaller globe artichokes lower down the stem.
- Prune the globe artichokes by snapping off unwanted shoots at the base. Remove small buds when they have grown to about 4 cm in diameter, i.e. 1, 5 inches.
- Encourage growth of the terminal bud by removing small buds on your globe artichoke plant.
- Cut back stems in autumn and protect the crown over winter with a thick mulch of bark chippings, straw or other material.
- In the second year, allow the edible heads to develop for harvesting in summer. Pick the terminal bud (the one at the top) first, when it's large and swollen, but before the scales have started to open - cut off with a few centimeters of stem attached. Pick the side buds when they have reached a decent size. (TIP: This is important to remember when you want to harvest your globe artichokes.).
In the third growth season:
- Now your plants will start to deteriorate.
- Replace approximately a third of your plants every year so as to maintain a steady, regular supply of good quality globe artichokes season upon season.
How to harvest your Globe Artichokes
It takes about 50 to 100 days from globe artichoke plants that grows from suckers to harvesting time. That means anytime up to 9 months before you can eat a fresh globe artichoke that has been cultivated in your home garden.
If you happen to grow your globe artichokes from seed, then you will only see the first buds after about a year of growth.
Interestingly enough, you can harvest globe artichokes at various stages. Under usual circumstances the globe artichokes can be cut off when the heads are plump and the scales are still soft and green. In other words, just before the globe artichoke flower opens. The peak season for artichoke harvesting is the spring, but they continue to be harvested throughout the summer, with another peak period in mid autumn. You will also notice that your mature plants, the plants that are in its second season of growth, you can harvest your globe artichokes in early summer and the younger plants that are at harvesting stage can be harvested in late summer.
When harvesting you not only get to enjoy the fruits of your labor, you also stimulate secondary growth in your globe artichoke which might result in harvesting a second crop.
Always harvest globe artichokes when the flower heads are heavy with a soft green color. The flower head should be tightly packed with closed leaves. Flavor is signaled by the color that can be seen on the leaf tips. A bronzed or frosted leaf tip will indicate a delicate flavor. Stay away from wilted and mouldy leaves.
You can store your globe artichokes in your refrigerator in a plastic bag, though it is better to use them fresh. When storing your globe artichokes for later use you should make sure that it does not dry out. (TIP: Add a few drops of water to the globe artichokes in the plastic bag and DO NOT wash the artichokes when it is to be stored.)
Troubleshooting Globe Artichoke, crop failure and growing pains
- A poor crop – you need to plant your globe artichoke plant in fertile, well drained soil. Or it could be that you allowed the roots to dry out in the summer.
- Only one flower head – it is the plant’s first season. The globe artichoke will provide more prolific in the second and third season.
- The flower heads are shrivelled and have fluffy mould growth – this could be grey mould infestation. Even though globe artichokes should not be allowed to dry out, it does not mean that they like being totally wet, damp and overcrowded all the time. Globe artichokes need a sunny position. You should control the growth of this grey mould with good hygiene. Increase aeration if possible and avoid overcrowded, damp and shaded spots. Remove all dead buds or flowers to stop the grey mould from spreading.
- There are yellow spots on the leaves with downy mould underneath the leaves – this could be a Lettuce Downy Mildew infestation. The only remedy here is to remove and destroy the distressed leaves. You may even have to remove the whole globe artichoke plant to get rid of Lettuce Downy Mildew.
- My Globe artichokes are too small – if you want large globe artichokes then it is advisable to reduce the shoots of your plant down to three shoots per plant when it is in its second season of growth.
- My globe artichoke plants keep drying out – you should water your plants well and protect them with a layer of mulch especially in hot weather areas.
- My globe artichoke plants do not flower – it could be that you fertilized and thus provided the plants with too much nitrogen.
- My globe artichoke plants die off in winter – Even in the second season this may happen. It is mainly due to the roots getting too cold especially in the cooler areas. You should help the roots survive the cold by cutting the plant back to about 10 inches, covering it with a bushel basket or reed basket and then placing mulch around the basket. Make sure that the mulch is at least 2 feet thick then it will help to maintain an even soil temperature.
Uses of Artichokes
Tips for Preparing and Serving Globe Artichokes
Cut off the heads with approximately 5-8 cm, i.e. 2-3 inches of the stem to harvest your globe artichokes. You could even be so bold as to snip the flower head off at the base of the plants if there are no secondary buds on the plant itself.
Wash the globe artichokes under running water.
Pull off the outer, lower petals and trim off the spikes at the end of the scales or outer leaves. Some globe artichokes may even have some spikes on the ends of the scales. The trimming off of the spikes can be as much as about a quarter of the scale. This will take care of the spikes and will then not interfere with handling the leaves when eating your globe artichokes.
Boil the artichokes in water (you may add salt if you so desire.) standing in an upright position in a saucepan for between 20 and 40 minutes. Or you could also steam the artichokes. The artichoke boiling is done when you are able to pull the center petal out with no fuss. At this stage the globe artichoke is tender. If you cover your pot while boiling your globe artichokes, your artichokes may turn brown due to the acids and the chlorophyll that will be oxidized. (TIP: Do NOT cover the pot while boiling the globe artichokes. This will facilitate the acids to boil out into the air.)
Artichokes can then be served, either hot, at room temperature or even cold. Artichokes make excellent appetizers. They taste very good in a variety of dips and sauces. You do not even have to be very adventurous as they will also taste great in plain lemon juice or even olive oil.
If you do not intend boiling your globe artichokes immediately, you can also place them in some vinegary water or even lemony water to prevent discoloration.
Eating Globe artichokes
- Uncooked leaves left in vinegary water or lemon juice can be eaten with a dip. Dips suitable are hollandaise, mayonnaise, balsamic vinegar (This may result in some discoloration due to the balsamic vinegar color), butter, garlic sauce, different types of chilli sauces and any sauce that tickles your fancy.
- Cooked leaves are usually the spring vegetable of choice on a four season’s pizza.
- Together with olives (summer), mushrooms (autumn) and prosciutto (winter)- as the seasons change.
- Globe artichokes sprinkled with olive oil and barbequed.
- Globe artichokes in paella with rice.
- Globe artichokes sautéed and made into a frittata with eggs.
Other uses of artichokes
- Globe Artichoke tea – this is a herbal tea. In some regions in Vietnam this tea is produced on a commercial basis.
- Globe Artichoke liquor – in this liquor, also known as Cynar, the artichokes is used as the main flavouring agent.
- Globe artichoke plants left to flower – these plants have beautiful bright flowers and can be grown in border showing off its bold foliage and large purple flowers.
- Globe Artichoke medicine – Cynarin is the active medicinal ingredient found in globe artichokes.
Onions (Liliaceae - Allium cepa)
Onions is such a nutritious and versatile vegetable in that it can be eaten on its own or mixed with a variety of foods. Onions is cultivated in most parts of the world. Although onions grow very easily, they take between seven to eight months from planting before they can be harvested. The onion is a vegetable that has a very long growing season. No kitchen should be without onions. In fact no house should be without onions. Onions is not just a culinary vegetable; it can also be used as a medicine in the treatment of gout. (The juice of a medium onion – extracted in a garlic press - can be added to an infusion that is made up of a half cupful of pennyroyal mint and one cup of boiling water. The pennyroyal mint and water should be left to steep for about twenty minutes, then it should be strained and added to the onion juice. Thereafter you can dip a piece of lint into the mixture and wrapped around the gout afflicted areas.)
Onion can also be used as a cosmetic in that some people use it as a shampoo to aid hair growth. The scalp is rubbed with chopped onion and left on for approximately fifteen minutes thereafter it is washed with a mild shampoo and followed with a vinegar rinse. Onion is also known to heal skin ailments such as cuts and acne.
These days many of the hardy varieties of onions are perennial vegetables.
Nutrients in onions
Onions contain many nutrients such as vitamin A, B1, B2 and B3 as well as vitamin E. As such onions can be used in so many ways. It has antibiotic properties and is diuretic, anti spasmodic, hypotensive and hypoglycemic. Onions can also be used to lower blood pressure and blood sugar levels and is useful to treat coughs, colds and bronchitis as well as gastric complaints.
Onions is such a versatile vegetable that it can be used in soups, stews, and meat and poultry dishes as well as in raw salads. Most savory dishes have onion as one of the ingredients. Onion pickles are just divine as a condiment and accompaniment to a lot of dishes. Onions can be a bit smelly on the breath, but there is always something in a home vegetable garden that can help. Just think about chewing a sprig of fresh parsley.
How to grow onions
Where and when to plant your onions
Onions will grow well in sandy soil. You should test your soil to ascertain what type of garden soil you have in your vegetable patch. The onion is a vegetable that does not like acidic or clayey garden soil. If your garden soil happens to be acidic then you can use soil amendments such as lime to prepare the onion vegetable bed.
A good sowing and planting date would be in the fall or autumn because onions prefer cool weather conditions in the first part of their growth season. As soon as the bulbs are forming, and during harvesting, onions prefer warmer weather with higher temperatures.
Onions make great companion plants to herbs such as chamomile which will enhance the growth of the onions, other vegetables such as carrots since it combats garden pests such as carrot fly, and beetroot.
Prepare the soil with a generous helping of compost as well as a cupful of 2:3:2 fertilizer or superphosphate per square meter.
Work in a few spades of river sand to aid in drainage if your garden happens to be too clayey. That is apart from the normal type of soil amendments that should be done in the case of clayey garden soil.
How to sow your onion seeds
It is recommended that you make use of a seedbed if it is the first time that you as a gardener sow onion seeds. First germinate the onions seeds in the seedbed and then transplant the onion seedlings into the soil where you want to cultivate your onions. (TIP: Sow you onion seeds to the depth of your fingernail.) The seedbed rows should be a hand-width apart and the seedbed should be watered thoroughly so that conditions are favorable for germination. Germination takes about two weeks. Transplanting of onion seedlings can take place when the seedlings are approximately 6 cm high. That usually takes about 6 to 8 weeks after germination. Onion seedlings should be transplanted into rows that are placed about three hand-widths apart. The onion seedlings itself can be planted seven and a half to ten centimeters part in the prepared beds. To facilitate easy transplanting of your onion seedlings, the leaves can be trimmed back to between ten and twelve centimeters and the roots to about one to two centimeters.
Direct sowing or sowing the seeds in situ is also possible when you have a good irrigation system in place. The onion plant itself grows to a length of between twenty and thirty centimeters long.
Taking care of your onions
The recipe for success when cultivating onions is fertile soil and good drainage. Make use of compost and kraal manure for best results. Do not hesitate to also add a cupful of superphosphate per square meter.
To practice organic gardening you should choose the correct companion plants to grow with your onions. Be vigilant for garden pests and diseases. Remove weeds on a regular basis (in the home vegetable garden it can be done by hand) and make us of mulch between rows of onion plants.
When transplanting your onions seedlings, do not plant them too deep. Only cover the roots and approximately half a centimeter of the stem with garden soil. It does not matter if the plant falls over or the stems suffer a little damage as the onion is quite a hardy little vegetable that will pull itself together.
Do not overwater the onion plants as it may result in the plant rotting. Though you should make sure that you onion plants have sufficient water.
Apply additional nutrient to the garden soil a month after planting.
Take care to water in the fertilizers and additional nutrients after application.
Watch out for pests such as cutworm and snails and slugs.
How to harvest your onions crop
Your onion crop will be ready for harvesting when the leaves begin to dry, yellow and fall off.
You should pull the onion out by the leaves.
Then leave the onions to dry out in the sun for approximately three days. Take care to ensure that the bulb of each of the harvested onions is covered so as to prevent sunburn. (TIP: Have the onion leaves of the one harvested vegetable cover the bulb of the other harvested onions for drying out purposes.)
If necessary you may also bend the leaves of the onion plant to encourage drying off.
Store your harvested onions in a dry, well-ventilated, shady position. Ideally on wire racks.
Alternatively you can plait the leaves of the dried harvested onions together in a bundle and hang them up in a cool dry place.
After two to four weeks the onions will be ready for use.
Troubleshooting onions crop failure and growing pains
Downy mildew on onions
Dry hot temperatures are favorable conditions for insects, and mild moist conditions such as rain, mist or dew will promote disease such as downy mildew. Choose the area that you intend to use as your vegetable bed to avoid these conditions.
Onions rotting
Often farmers and gardeners are of the opinion that they should flatten the onion plants when there are signs of the onions ripening (that is when the stems start to brown). This can result in the onion rotting down into the neck of the onion because the onion is then forced to dry out unnaturally. In essence what does happen is that the last bit of nutrients is cut off and worse the onion is thus not as juicy as it otherwise would have been.
Onions do not last long after harvesting
This could also be a result of neck rot in onion plants. Furthermore you should always ensure that the onion is kept in a dry place. Moisture after harvesting the vegetables will result in the onions rotting.
Onion leaves yellowing prematurely
Yellowing of onion plants in its growing season is due to nitrogen deficiencies in the garden soil. While in the growing season and the onion leaves start turning light green to yellow then you should add some 6:3:2 fertilizerwhich will provide the onion plant with enough nitrogen.
Tomatoes (Lycopersicon lycopersicum and other tomato sp.)

Green tomatoes on the vine.

Transplant tomato seedlingwhen they are 4 - 5 inches high
There are so many varieties of tomatoes that it is not unthinkable to have a whole garden comprising entirely of tomatoes. Botanically speaking tomatoes are actually a fruit and not a vegetable, and to be more precise, tomatoes are actually a berry. However, most people refer to tomatoes as vegetables, hence the reason why it appears under the home vegetable garden section. Following are a few examples of determinate or unstaked tomatoes and indeterminate or staked tomatoes. The cherry tomato, or the Lycopersicon esculentum, as it is also known has taken great strides in popularity because it makes a wonderful feature plant with its beautiful small berry like produce. Furthermore, these little cherry tomatoes are so decorative that it does not hurt to make your tomato feature plant in your garden. Very popular cherry tomato varieties are the Sweet 100, the Tiny Timand let us not forget to mention the Cherry Belle.
There are so many tomato varieties to choose from. The Flora Dade a medium sized determinate tomato with a lovely red hue, the Pearsonwith its pear-shaped pinkish, fleshy fruits, the Homestead which is a small compact tomato, the Marvel of the Market which is quite a hardy tomato and resistant to many diseases, the Potentate and the MoneyMaker which are both prolific providers of tomatoes, albeit that the fruits are tinier than the other tomato varieties, the Oxheart tomato, the Beauty, and the robust Indian River tomatoes, the Roma and King Humberttomatoes which are elongated and less fleshy, and the many cherry tomatoes varieties. And of course these days there are also purple, green and yellow tomatoes. (TIP: It is advisable to ask at your local nursery which tomato variety will do well in your specific area.)
For the home vegetable gardener it is advisable to invest in a simple frame as a support structure for tomatoes. Free standing obelisks not only make for a beautiful feature, but it also allows for easy movement of the tomato beds. As an added bonus the obelisks are quite sturdy. Twisting the tomato plant’s branches around the obelisk is easy and attachment with gardener’s plastic-coated wire is just as effortless. (TIP: Alternatively you could just make use of a strand or two of thick wire between well-supported poles.)
Nutrients in Tomatoes
Tomatoes are rich in very valuable minerals such as calcium, magnesium and phosphorous. Tomatoes are also filled with vitamins C, A, E, K and B6 as well as folic acid and of course beta carotene.
Tomatoes are also rich in lycopene, a powerful antioxidant, which helps to protect against various forms of cancer, eye cataracts and muscular degeneration. The lycopene in tomatoes also helps to lower the risk of heart disease.
And believe it or not, tomatoes are actually alkaline and not acidic.
How to grow Tomatoes
Where and when to plant your Tomatoes
Tomatoes are a summer crop and are susceptible to frost. Only sow your tomato seeds when you are sure that the danger of frost is past. Other than the frost issue, it is possible to sow tomato seeds right through the year.
Tomatoes will grow in almost any type of garden soil, but if you are interested in a high yield of good quality tomatoes for a harvest then you should consider planting your tomatoes in a well-prepared soil. This soil preparation should be completed 2 to 3 weeks before transplanting your tomato seedlings. Work into the garden soil where you intend to plant the tomato seedlings a generous amount of compost as well as a cup full of 3:1:5 fertilizer per square meter. Tomatoes are greedy feeders and it is better to amend your garden soil so that you ensure a bumper crop of tomatoes.
For the no-till home gardener it is also a good idea to plant tomatoes in garden soil where less greedy feeding vegetables such as beetroots, carrots, radish, spinach, celery, endive or lettuce was grown in the previous season.
How to sow your Tomato seeds
It is recommended that tomato seeds are sown in seedbeds first. First wet the seedbeds to ensure that the garden soil in the intended seedbed in moist when the seeds are sown.
The tomato seeds should be sown about a thumb’s width apart and approximately as deep as the nail on your index finger.
Sow the tomato seeds in furrows that are approximately a hand width apart.
Transplanting the tomato seedlings
About 30 days after sowing you may proceed to transplant your successfully germinated tomato seedlings.
At this stage you tomato seedling should be approximately 4 to 5 inches (10 to 12 cm) high and have about 4 sets of leaves.
Water the seedbeds at this stage (that is before transplanting the tomato seedlings) to ensure that the garden soil is moist when the seedlings are removed.
Use a trowel to dig out the tomato seedlings. Take care to leave as much soil as possible left clinging to the roots.
Discard all tomato seedlings that show signs of distress or disease. Check for nematode infestation.
Plant the tomato seedlings 36 inches (90 cm) apart in rows that are 18 to 24 inches (45 to 60 cm) apart.
Plant the tomato seedlings relatively deeply into to garden bed so that only the top two sets of leaves are above the ground. Remove the lower two sets of tomato seedling leaves carefully.
Water the tomato seedlings immediately after transplanting.
Try to keep the transplantation time to tomato seedlings restricted to the afternoons when it is cooler.
Taking care of your Tomatoes
Protect your tomato plants against frost.
Watch out for garden pests such as white fly and fungal infections that may attack your tomato plants.
Do not allow the fruits of the tomato plant to lie on the ground. It will rot.
Do apply fertilizer to your tomatoes regularly for at least 12 to 15 weeks. This regular fertilization can be LAN and 3:1:5 (38) every fortnight. Do interchange the fertilizers every time – say you make use of LAN the first fortnight then use 3:1:3 (38) the next time around.
Staking of tomatoes is an important step when growing indeterminate tomato varieties. (See the pruning section below.)
Although tomato plants have a strong root system, water it well. Whatever you do, try NOT to water your tomato plants with a sprinkler system. Always avoid wetting the tomato plant leaves. When the weather is cool you may water your tomato plants every 7 to 10 days. In hotter areas you should water your tomato plants every 4 to 5 days. Also bear in mind that the type of garden soil, whether it is clayey, sandy or loamy, will also have in influence on how often you need to water your tomato plants.
Once your tomato plants have established themselves, after transplanting, you should be on the lookout for weeds that might want to grow in the tomato beds. Dig out the weeds carefully – preferably do your weeding by hand to avoid damaging the tomato plant roots.
It is possible to grow tomatoes on supports provided that they are pruned down to a single stem. In this way your tomatoes will not only look neater, but it will also be suitable to be grown in containers. Tomatoes staked for support in containers also makes for easier spraying if necessary. (TIP: This is a handy practice when growing the tall variety tomato of which the cherry tomato (indeterminate or staked) and Hotstuff are good examples.)
Do regular pruning of your tomato plants to ensure a bumper crop. See the section on pruning.
Feeding of the tomatoes must occur as soon as the first fruits have formed. Tomatoes should be fed by the application of compost around the tomato plant. Take care not to have the compost touch the tomato plant stem.
Tomatoes will respond well to mulching. Use leaves, hay, old peat and even sawdust or bark chips as mulch and cover the garden soil surface.
Pruning Tomatoes
Tomatoes should be pruned about once a week. Pruning of tomatoes are only applicable to the tall growing, indeterminate, staked tomato varieties. It is recommended that all home vegetable gardeners choose to cultivate these tomatoes as they provide so many more advantages such as a higher yield, a longer harvesting period, and – very valuable for the home vegetable gardener – more value per area of space occupied. All indeterminate, staked tomato varieties can be trained up to grow on various structures using polypropylene strings. You can even have these tomatoes hanging down these strings from eaves of buildings or frames.
The easiest way to stake tomato plants is to push a sharpened stick (preferably about 4 - 5 ft (120 - 150 cm long) into the garden soil nest to each tomato plant. Then tie the tomato plant with a piece of twine of string to the stick. DO not tie the tomato plant too tightly. Rather make a loop in the string so that the string is between the stick and the tomato plant.
When growing staked tomatoes do remove all the side shoots so that are is basically just one stem per plant. You can start this process when the shoots of your tomato plant is about 1 to 2 inches (3 to 5 cm) long and about 12 inches (30 cm) in height. (TIP: Do not cut off the shoots with a knife or pinch out the shoots with your fingers when pruning. Rather bend then carefully up and down until they break off.) This makes for easy management of your staked tomato plant. Odd enough, growing staked tomatoes in this fashion will yield the same produce as the un-pruned plants. However, when pruned the staked tomatoes will allow for more air circulation, more light, and when spraying, more fungicide to reach all parts of your tomato plants, hence reducing the risk of disease.
Pruning tomatoes in this fashion also results in a neater appearance which looks much more attractive in any garden of any size.
When growing staked tomatoes always make sure that you protect your produce by covering the tomatoes with sections of old stockings until the tomatoes are ripe. If you do not have old stocking, brown paper bags will also do.
How to harvest your Tomato crop
Tomatoes are usually ready for harvesting approximately 4 months after sowing or about two and a half months after transplanting out the tomato seedlings. Tomatoes are harvested from the tomato plants by breaking them off just above the fruit.
Increase the nutritional value and the taste of your tomatoes by having them ripen on the tomato vine itself. However, if you need to harvest before your tomatoes are properly ripe (in case some garden pests might spoil your harvest), then you may do so. When you harvest the green (there are some tomato varieties that are green when ripe) or rather unripe tomatoes you do not have to put the tomatoes in the sun to ripen.
After you have harvested the last tomatoes from your tomato plants you should remove the plants from the garden soil with its roots. Do this by lifting the plants up with a garden fork. Any of your tomato plants that show signs of disease should be destroyed. If the plants are not diseased then place them on your compost heap.
Troubleshooting Tomato, crop failure and growing pains
Tomatoes are not producing enough and growth is stunted
This can be a result of eelworm infestation. Eelworms are microscopic nematodes that enter the root systems of your tomato plants that are susceptible to eelworm infestation. These eelworms develop giant cells which will disrupt the root growth and its functions. This result in your tomatoes having stunted growth and in some cases even killing the tomato plants. In the mean time the pest builds up to incontrollable levels. Purchase seedlings or seeds of a tomato variety that is known to be eelworm resistant and grow and cultivate them instead.
Tomatoes plant life span is too short to produce tomatoes
This can be the result of diseases such as verticillium and fusarium wilts. These diseases are lurking in the garden soil. These wilts are very difficult to identify. Fortunately most of the new varieties of tomatoes are resistant to both these wilts that are present in garden soil.
Tomatoes not productive
This could be the result of you growing a tomato variety that is low on resistance to diseases. The Oxheart tomato variety has an extremely low resistance to disease and it could be that you are growing the Oxheart variety. Rather purchase a variety of tomato that is highly resistant to diseases. One such a tomato variety is the Hotstuff tomato. Hotstuff is known for its great yield in produce and excellent taste.
Tomatoes (small and medium tomato varieties) producing small fruits
This could be the result of not pruning your tomato plant. The Moneymaker tomato variety requires regular pruning else they will produce a lot of side-shoots and very small fruits. Prune your tomato plants once a week.
A month to month sowing guide for vegetable crops
Late Fall (November in the Northern Hemisphere • May in the Southern Hemisphere)
- Aubergines (Only in hot areas) - Aubergines take 2½ to 4 months to mature. Plant at a depth of 0.5 - 1 in (1.5 - 3 cm) and a distance of 2 ft (60 cm) between rows and 24 in (60 cm) between plants.
- Beans (bush) (Only in frost-free areas) - Beans (bush) take 2 to 3 months to mature. Plant at a depth of 1.5 - 2 in (4 - 5 cm) and a distance of 1.5 - 2.5 ft (45 - 75 cm) between rows and 3 - 5 in (7.5 - 12.5 cm) between plants.
- Beans (pole) (Only in frost-free areas) - Beans (pole) take 2½ to 4 months to mature. Plant at a depth of 1.5 - 2 in (4 - 5 cm) and a distance of 3 - 4 ft (90 - 120 cm) between rows and 6 - 9 in (15 - 22 cm) between plants.
- Beetroots (Caution in very cold areas) - Beetroots take 2 to 3 months to mature. Plant at a depth of 0.5 in (1.5 cm) and a distance of 2.5 ft (45 cm) between rows and 2 - 3 in (5 - 7.5 cm) between plants.
- Brinjals (Only in hot areas) - Brinjals take 2½ to 4 months to mature. Plant at a depth of 0.5 - 1 in (1.5 - 3 cm) and a distance of 2 ft (60 cm) between rows and 24 in (60 cm) between plants.
- Broad beans - Broad beans take 4 to 5 months to mature. Plant at a depth of 2 in (5 cm) and a distance of 3 ft (90 cm) between rows and 6 in (15 cm) between plants.
- Broccoli - Broccoli take 3 to 4 months to mature. Plant at a depth of 0.5 in (1.5 cm) and a distance of 1.5 - 2 ft (45 - 60 cm) between rows and 18 in (45 cm) between plants.
- Brussels sprouts - Brussels sprouts take 4 to 5 months to mature. Plant at a depth of 0.75 in (2 cm) and a distance of 2 ft (60 cm) between rows and 18 in (45 cm) between plants.
- Cabbages (Caution in very cold areas) - Cabbages take 3 to 5 months to mature. Plant at a depth of 0.75 in (2 cm) and a distance of 1.5 - 2 ft (45 - 60 cm) between rows and 12 - 18 in (30 - 45 cm) between plants.
- Carrots (Caution in very cold areas) - Carrots take 2½ to 3½ months to mature. Plant at a depth of 0.5 in (1.5 cm) and a distance of 1.25 - 1.5 ft (40 - 45 cm) between rows and 1 in (2.5 cm) between plants.
- Celery (Provide protection in cold areas) - Celery take 3 to 5 months to mature. Plant at a depth of 0.25 in (0.5 cm) and a distance of 2.5 ft (45 cm) between rows and 6 in (15 cm) between plants.
- Chilies (Only in hot areas) - Chilies take 2 to 3 months to mature. Plant at a depth of 0.5 in (1.5 cm) and a distance of 1.5 - 3 ft (45 - 90 cm) between rows and 12 - 24 in (30 - 60 cm) between plants.
- Corn (Only in hot areas) - Corn take 2 to 3 months to mature. Plant at a depth of 0.5 in (1.5 cm) and a distance of 1 - 2 ft (30 - 60 cm) between rows and 12 in (30 cm) between plants.
- Cucumbers (Only in hot areas) - Cucumbers take 2 to 3 months to mature. Plant at a depth of 0.5 - 1 in (1.5 - 3 cm) and a distance of 4 - 6 ft (120 - 180 cm) between rows and 2 - 3 ft (60 - 90 cm) between plants.
- Egg plants (Only in hot areas) - Egg plants take 2½ to 4 months to mature. Plant at a depth of 0.5 - 1 in (1.5 - 3 cm) and a distance of 2 ft (60 cm) between rows and 24 in (60 cm) between plants.
- 150 cm) - 150 cm) take to mature. Plant at a depth of and a distance of between rows and between plants.
- Leeks (Except in hot and very hot areas) - Leeks take 6 to 7 months to mature. Plant at a depth of 0.25 in (0.5 cm) and a distance of 1 - 1.5 ft (30 - 45 cm) between rows and 6 - 8 in (15 - 20 cm) between plants.
- Lettuce (Provide protection in frosty areas) - Lettuce take 2 to 3 months to mature. Plant at a depth of 0.25 - 0.5 in (0.5 - 1.5 cm) and a distance of 1 - 2 ft (30 - 60 cm) between rows and 9 - 12 in (22 - 30 cm) between plants.
- Lima beans (Only in frost-free areas) - Lima beans take 2½ to 4 months to mature. Plant at a depth of 1.5 - 2 in (4 - 5 cm) and a distance of 2.5 - 3 ft (75 - 90 cm) between rows and 4 - 6 in (10 - 15 cm) between plants.
- Marrows (Only in frost-free areas) - Marrows take 2½ to 3½ months to mature. Plant at a depth of 1.5 - 2 in (4 - 5 cm) and a distance of 6 - 9 ft (180 - 270 cm) between rows and 3 - 5 ft (90 - 150 cm) between plants.
- Onions - Onions take 6 to 8 months to mature. Plant at a depth of 0.5 in (1.5 cm) and a distance of 1 - 1.25 ft (30 - 36 cm) between rows and 4 in (10 cm) between plants.
- Peas (Only in frost-free or low frost areas) - Peas take 2½ to 4 months to mature. Plant at a depth of 2 in (5 cm) and a distance of 2.5 ft (75 cm) between rows and 2 - 3 in (5 - 7.5 cm) between plants.
- Peppers (Only in hot areas) - Peppers take 2 to 3 months to mature. Plant at a depth of 0.5 in (1.5 cm) and a distance of 1.5 - 3 ft (45 - 90 cm) between rows and 12 - 24 in (30 - 60 cm) between plants.
- Pumpkins (Only in hot areas) - Pumpkins take 4 to 6 months to mature. Plant at a depth of 1.5 - 2 in (4 - 5 cm) and a distance of 4 ft (120 cm) between rows and 2 - 3 ft (60 - 90 cm) between plants.
- Radishes - Radishes take 1 month to mature. Plant at a depth of 0.5 in (1.5 cm) and a distance of 0.75 - 1.5 ft (15 - 30 cm) between rows and 1 in (2.5 cm) between plants.
- Tomatoes (staked) (Only in frost-free areas) - Tomatoes (staked) take 2½ to 3 months to mature. Plant at a depth of 0.25 in (0.5 cm) and a distance of 3 - 4 ft (90 - 120 cm) between rows and 18 - 24 in (45 - 60 cm) between plants.
- Tomatoes (unstaked) (Only in frost-free areas) - Tomatoes (unstaked) take 2½ to 3 months to mature. Plant at a depth of 0.25 in (0.5 cm) and a distance of 4 - 5 ft (120 - 150 cm) between rows and 3 ft (90 cm) between plants.
- Turnips - Turnips take 2 to 3 months to mature. Plant at a depth of 0.25 - 0.5 in (0.5 - 1.5 cm) and a distance of 1 ft (30 cm) between rows and 4 - 6 in (10 - 15 cm) between plants.
Early Winter (December in the Northern Hemisphere • June in the Southern Hemisphere)
- Aubergines (Only in frost-free areas) - Aubergines take 2½ to 4 months to mature. Plant at a depth of 0.5 - 1 in (1.5 - 3 cm) and a distance of 2 ft (60 cm) between rows and 24 in (60 cm) between plants.
- Beans (bush) (Only in frost-free areas) - Beans (bush) take 2 to 3 months to mature. Plant at a depth of 1.5 - 2 in (4 - 5 cm) and a distance of 1.5 - 2.5 ft (45 - 75 cm) between rows and 3 - 5 in (7.5 - 12.5 cm) between plants.
- Beans (pole) (Only in frost-free areas) - Beans (pole) take 2½ to 4 months to mature. Plant at a depth of 1.5 - 2 in (4 - 5 cm) and a distance of 3 - 4 ft (90 - 120 cm) between rows and 6 - 9 in (15 - 22 cm) between plants.
- Beetroots - Beetroots take 2 to 3 months to mature. Plant at a depth of 0.5 in (1.5 cm) and a distance of 2.5 ft (45 cm) between rows and 2 - 3 in (5 - 7.5 cm) between plants.
- Brinjals (Only in frost-free areas) - Brinjals take 2½ to 4 months to mature. Plant at a depth of 0.5 - 1 in (1.5 - 3 cm) and a distance of 2 ft (60 cm) between rows and 24 in (60 cm) between plants.
- Broccoli - Broccoli take 3 to 4 months to mature. Plant at a depth of 0.5 in (1.5 cm) and a distance of 1.5 - 2 ft (45 - 60 cm) between rows and 18 in (45 cm) between plants.
- Cabbages - Cabbages take 3 to 5 months to mature. Plant at a depth of 0.75 in (2 cm) and a distance of 1.5 - 2 ft (45 - 60 cm) between rows and 12 - 18 in (30 - 45 cm) between plants.
- Carrots - Carrots take 2½ to 3½ months to mature. Plant at a depth of 0.5 in (1.5 cm) and a distance of 1.25 - 1.5 ft (40 - 45 cm) between rows and 1 in (2.5 cm) between plants.
- Chilies (Only in frost-free areas) - Chilies take 2 to 3 months to mature. Plant at a depth of 0.5 in (1.5 cm) and a distance of 1.5 - 3 ft (45 - 90 cm) between rows and 12 - 24 in (30 - 60 cm) between plants.
- Corn (Only in frost-free areas) - Corn take 2 to 3 months to mature. Plant at a depth of 0.5 in (1.5 cm) and a distance of 1 - 2 ft (30 - 60 cm) between rows and 12 in (30 cm) between plants.
- Cucumbers (Only in hot areas) - Cucumbers take 2 to 3 months to mature. Plant at a depth of 0.5 - 1 in (1.5 - 3 cm) and a distance of 4 - 6 ft (120 - 180 cm) between rows and 2 - 3 ft (60 - 90 cm) between plants.
- Egg plants (Only in frost-free areas) - Egg plants take 2½ to 4 months to mature. Plant at a depth of 0.5 - 1 in (1.5 - 3 cm) and a distance of 2 ft (60 cm) between rows and 24 in (60 cm) between plants.
- Gem squash (Only in frost-free areas) - Gem squash take 2½ to 3½ months to mature. Plant at a depth of 1.5 - 2 in (4 - 5 cm) and a distance of 6 - 9 ft (180 - 270 cm) between rows and 3 - 5 ft (90 - 150 cm) between plants.
- Leeks (Only in cool areas) - Leeks take 6 to 7 months to mature. Plant at a depth of 0.25 in (0.5 cm) and a distance of 1 - 1.5 ft (30 - 45 cm) between rows and 6 - 8 in (15 - 20 cm) between plants.
- Lettuce - Lettuce take 2 to 3 months to mature. Plant at a depth of 0.25 - 0.5 in (0.5 - 1.5 cm) and a distance of 1 - 2 ft (30 - 60 cm) between rows and 9 - 12 in (22 - 30 cm) between plants.
- Lima beans (Only in frost-free areas) - Lima beans take 2½ to 4 months to mature. Plant at a depth of 1.5 - 2 in (4 - 5 cm) and a distance of 2.5 - 3 ft (75 - 90 cm) between rows and 4 - 6 in (10 - 15 cm) between plants.
- Marrows (Only in frost-free areas) - Marrows take 2½ to 3½ months to mature. Plant at a depth of 1.5 - 2 in (4 - 5 cm) and a distance of 6 - 9 ft (180 - 270 cm) between rows and 3 - 5 ft (90 - 150 cm) between plants.
- Onions - Onions take 6 to 8 months to mature. Plant at a depth of 0.5 in (1.5 cm) and a distance of 1 - 1.25 ft (30 - 36 cm) between rows and 4 in (10 cm) between plants.
- Peas - Peas take 2½ to 4 months to mature. Plant at a depth of 2 in (5 cm) and a distance of 2.5 ft (75 cm) between rows and 2 - 3 in (5 - 7.5 cm) between plants.
- Peppers (Only in frost-free areas) - Peppers take 2 to 3 months to mature. Plant at a depth of 0.5 in (1.5 cm) and a distance of 1.5 - 3 ft (45 - 90 cm) between rows and 12 - 24 in (30 - 60 cm) between plants.
- Pumpkins (Only in hot areas) - Pumpkins take 4 to 6 months to mature. Plant at a depth of 1.5 - 2 in (4 - 5 cm) and a distance of 4 ft (120 cm) between rows and 2 - 3 ft (60 - 90 cm) between plants.
- Radishes - Radishes take 1 month to mature. Plant at a depth of 0.5 in (1.5 cm) and a distance of 0.75 - 1.5 ft (15 - 30 cm) between rows and 1 in (2.5 cm) between plants.
- Spinach Beets - Spinach Beets take 2 to 3 months to mature. Plant at a depth of 0.5 in (1.5 cm) and a distance of 1 - 1.5 ft (30 - 45 cm) between rows and 9 in (22 cm) between plants.
- Swiss Chard - Swiss Chard take 2 to 3 months to mature. Plant at a depth of 0.5 in (1.5 cm) and a distance of 1 - 1.5 ft (30 - 45 cm) between rows and 9 in (22 cm) between plants.
- Tomatoes (staked) (Only in frost-free areas) - Tomatoes (staked) take 2½ to 3 months to mature. Plant at a depth of 0.25 in (0.5 cm) and a distance of 3 - 4 ft (90 - 120 cm) between rows and 18 - 24 in (45 - 60 cm) between plants.
- Tomatoes (unstaked) (Only in frost-free areas) - Tomatoes (unstaked) take 2½ to 3 months to mature. Plant at a depth of 0.25 in (0.5 cm) and a distance of 4 - 5 ft (120 - 150 cm) between rows and 3 ft (90 cm) between plants.
- Turnips - Turnips take 2 to 3 months to mature. Plant at a depth of 0.25 - 0.5 in (0.5 - 1.5 cm) and a distance of 1 ft (30 cm) between rows and 4 - 6 in (10 - 15 cm) between plants.
Mid-Winter (January in the Northern Hemisphere • July in the Southern Hemisphere)
- Aubergines (Only in frost-free areas) - Aubergines take 2½ to 4 months to mature. Plant at a depth of 0.5 - 1 in (1.5 - 3 cm) and a distance of 2 ft (60 cm) between rows and 24 in (60 cm) between plants.
- Beans (bush) (Only in frost-free areas) - Beans (bush) take 2 to 3 months to mature. Plant at a depth of 1.5 - 2 in (4 - 5 cm) and a distance of 1.5 - 2.5 ft (45 - 75 cm) between rows and 3 - 5 in (7.5 - 12.5 cm) between plants.
- Beans (pole) (Only in frost-free areas) - Beans (pole) take 2½ to 4 months to mature. Plant at a depth of 1.5 - 2 in (4 - 5 cm) and a distance of 3 - 4 ft (90 - 120 cm) between rows and 6 - 9 in (15 - 22 cm) between plants.
- Beetroots - Beetroots take 2 to 3 months to mature. Plant at a depth of 0.5 in (1.5 cm) and a distance of 2.5 ft (45 cm) between rows and 2 - 3 in (5 - 7.5 cm) between plants.
- Brinjals (Only in frost-free areas) - Brinjals take 2½ to 4 months to mature. Plant at a depth of 0.5 - 1 in (1.5 - 3 cm) and a distance of 2 ft (60 cm) between rows and 24 in (60 cm) between plants.
- Broccoli - Broccoli take 3 to 4 months to mature. Plant at a depth of 0.5 in (1.5 cm) and a distance of 1.5 - 2 ft (45 - 60 cm) between rows and 18 in (45 cm) between plants.
- Carrots - Carrots take 2½ to 3½ months to mature. Plant at a depth of 0.5 in (1.5 cm) and a distance of 1.25 - 1.5 ft (40 - 45 cm) between rows and 1 in (2.5 cm) between plants.
- Chilies (Only in frost-free areas) - Chilies take 2 to 3 months to mature. Plant at a depth of 0.5 in (1.5 cm) and a distance of 1.5 - 3 ft (45 - 90 cm) between rows and 12 - 24 in (30 - 60 cm) between plants.
- Corn (Only in frost-free areas) - Corn take 2 to 3 months to mature. Plant at a depth of 0.5 in (1.5 cm) and a distance of 1 - 2 ft (30 - 60 cm) between rows and 12 in (30 cm) between plants.
- Cucumbers (Only in hot areas) - Cucumbers take 2 to 3 months to mature. Plant at a depth of 0.5 - 1 in (1.5 - 3 cm) and a distance of 4 - 6 ft (120 - 180 cm) between rows and 2 - 3 ft (60 - 90 cm) between plants.
- Egg plants (Only in frost-free areas) - Egg plants take 2½ to 4 months to mature. Plant at a depth of 0.5 - 1 in (1.5 - 3 cm) and a distance of 2 ft (60 cm) between rows and 24 in (60 cm) between plants.
- Gem squash (Only in frost-free areas) - Gem squash take 2½ to 3½ months to mature. Plant at a depth of 1.5 - 2 in (4 - 5 cm) and a distance of 6 - 9 ft (180 - 270 cm) between rows and 3 - 5 ft (90 - 150 cm) between plants.
- Leeks (Only in mild areas) - Leeks take 6 to 7 months to mature. Plant at a depth of 0.25 in (0.5 cm) and a distance of 1 - 1.5 ft (30 - 45 cm) between rows and 6 - 8 in (15 - 20 cm) between plants.
- Lettuce - Lettuce take 2 to 3 months to mature. Plant at a depth of 0.25 - 0.5 in (0.5 - 1.5 cm) and a distance of 1 - 2 ft (30 - 60 cm) between rows and 9 - 12 in (22 - 30 cm) between plants.
- Lima beans (Only in frost-free areas) - Lima beans take 2½ to 4 months) - Lima beans take to mature. Plant at a depth of 1.5 - 2 in (4 - 5 cm) and a distance of 2.5 - 3 ft (75 - 90 cm) between rows and 4 - 6 in (10 - 15 cm) between plants.
- Marrows (Only in frost-free areas) - Marrows take 2½ to 3½ months to mature. Plant at a depth of 1.5 - 2 in (4 - 5 cm) and a distance of 6 - 9 ft (180 - 270 cm) between rows and 3 - 5 ft (90 - 150 cm) between plants.
- Onions (Bulbs will be smaller than usual) - Onions take 6 to 8 months to mature. Plant at a depth of 0.5 in (1.5 cm) and a distance of 1 - 1.25 ft (30 - 36 cm) between rows and 4 in (10 cm) between plants.
- Peas (Only in cool areas) - Peas take 2½ to 4 months to mature. Plant at a depth of 2 in (5 cm) and a distance of 2.5 ft (75 cm) between rows and 2 - 3 in (5 - 7.5 cm) between plants.
- Peppers (Only in frost-free areas) - Peppers take 2 to 3 months to mature. Plant at a depth of 0.5 in (1.5 cm) and a distance of 1.5 - 3 ft (45 - 90 cm) between rows and 12 - 24 in (30 - 60 cm) between plants.
- Potatoes (Except in hot areas or where there's a risk of late frost) - Potatoes take 3 to 5 months to mature. Plant at a depth of 5 - 6 in (12 - 15 cm) and a distance of 3 ft (90 cm) between rows and 12 in (30 cm) between plants.
- Pumpkins (Only in frost-free areas) - Pumpkins take 4 to 6 months to mature. Plant at a depth of 1.5 - 2 in (4 - 5 cm) and a distance of 4 ft (120 cm) between rows and 2 - 3 ft (60 - 90 cm) between plants.
- Radishes - Radishes take 1 month to mature. Plant at a depth of 0.5 in (1.5 cm) and a distance of 0.75 - 1.5 ft (15 - 30 cm) between rows and 1 in (2.5 cm) between plants.
- Spinach Beets - Spinach Beets take 2 to 3 months to mature. Plant at a depth of 0.5 in (1.5 cm) and a distance of 1 - 1.5 ft (30 - 45 cm) between rows and 9 in (22 cm) between plants.
- Swiss Chard - Swiss Chard take 2 to 3 months to mature. Plant at a depth of 0.5 in (1.5 cm) and a distance of 1 - 1.5 ft (30 - 45 cm) between rows and 9 in (22 cm) between plants.
- Tomatoes (staked) (Provide protection in frosty areas) - Tomatoes (staked) take 2½ to 3 months to mature. Plant at a depth of 0.25 in (0.5 cm) and a distance of 3 - 4 ft (90 - 120 cm) between rows and 18 - 24 in (45 - 60 cm) between plants.
- Tomatoes (unstaked) (Provide protection in frosty areas) - Tomatoes (unstaked) take 2½ to 3 months to mature. Plant at a depth of 0.25 in (0.5 cm) and a distance of 4 - 5 ft (120 - 150 cm) between rows and 3 ft (90 cm) between plants.
- Turnips - Turnips take 2 to 3 months to mature. Plant at a depth of 0.25 - 0.5 in (0.5 - 1.5 cm) and a distance of 1 ft (30 cm) between rows and 4 - 6 in (10 - 15 cm) between plants.
Late Winter (February in the Northern Hemisphere • August in the Southern Hemisphere)
- Aubergines (Provide protection in cold areas) - Aubergines take 2½ to 4 months to mature. Plant at a depth of 0.5 - 1 in (1.5 - 3 cm) and a distance of 2 ft (60 cm) between rows and 24 in (60 cm) between plants.
- Beans (bush) (Only in frost-free areas) - Beans (bush) take 2 to 3 months to mature. Plant at a depth of 1.5 - 2 in (4 - 5 cm) and a distance of 1.5 - 2.5 ft (45 - 75 cm) between rows and 3 - 5 in (7.5 - 12.5 cm) between plants.
- Beans (pole) (Only in frost-free areas) - Beans (pole) take 2½ to 4 months to mature. Plant at a depth of 1.5 - 2 in (4 - 5 cm) and a distance of 3 - 4 ft (90 - 120 cm) between rows and 6 - 9 in (15 - 22 cm) between plants.
- Beetroots - Beetroots take 2 to 3 months to mature. Plant at a depth of 0.5 in (1.5 cm) and a distance of 2.5 ft (45 cm) between rows and 2 - 3 in (5 - 7.5 cm) between plants.
- Brinjals (Provide protection in cold areas) - Brinjals take 2½ to 4 months to mature. Plant at a depth of 0.5 - 1 in (1.5 - 3 cm) and a distance of 2 ft (60 cm) between rows and 24 in (60 cm) between plants.
- Broccoli - Broccoli take 3 to 4 months to mature. Plant at a depth of 0.5 in (1.5 cm) and a distance of 1.5 - 2 ft (45 - 60 cm) between rows and 18 in (45 cm) between plants.
- Cabbages - Cabbages take 3 to 5 months to mature. Plant at a depth of 0.75 in (2 cm) and a distance of 1.5 - 2 ft (45 - 60 cm) between rows and 12 - 18 in (30 - 45 cm) between plants.
- Carrots - Carrots take 2½ to 3½ months to mature. Plant at a depth of 0.5 in (1.5 cm) and a distance of 1.25 - 1.5 ft (40 - 45 cm) between rows and 1 in (2.5 cm) between plants.
- Chilies (Provide protection in cool and cold areas) - Chilies take 2 to 3 months to mature. Plant at a depth of 0.5 in (1.5 cm) and a distance of 1.5 - 3 ft (45 - 90 cm) between rows and 12 - 24 in (30 - 60 cm) between plants.
- Corn (Only in frost-free areas) - Corn take 2 to 3 months to mature. Plant at a depth of 0.5 in (1.5 cm) and a distance of 1 - 2 ft (30 - 60 cm) between rows and 12 in (30 cm) between plants.
- Cucumbers (Only in frost-free areas) - Cucumbers take 2 to 3 months to mature. Plant at a depth of 0.5 - 1 in (1.5 - 3 cm) and a distance of 4 - 6 ft (120 - 180 cm) between rows and 2 - 3 ft (60 - 90 cm) between plants.
- Egg plants (Provide protection in cold areas) - Egg plants take 2½ to 4 months to mature. Plant at a depth of 0.5 - 1 in (1.5 - 3 cm) and a distance of 2 ft (60 cm) between rows and 24 in (60 cm) between plants.
- Gem squash (Only in frost-free areas) - Gem squash take 2½ to 3½ months to mature. Plant at a depth of 1.5 - 2 in (4 - 5 cm) and a distance of 6 - 9 ft (180 - 270 cm) between rows and 3 - 5 ft (90 - 150 cm) between plants.
- Leeks (Only in cool areas) - Leeks take 6 to 7 months to mature. Plant at a depth of 0.25 in (0.5 cm) and a distance of 1 - 1.5 ft (30 - 45 cm) between rows and 6 - 8 in (15 - 20 cm) between plants.
- Lettuce - Lettuce take 2 to 3 months to mature. Plant at a depth of 0.25 - 0.5 in (0.5 - 1.5 cm) and a distance of 1 - 2 ft (30 - 60 cm) between rows and 9 - 12 in (22 - 30 cm) between plants.
- Lima beans (Only in frost-free areas) - Lima beans take 2½ to 4 months to mature. Plant at a depth of 1.5 - 2 in (4 - 5 cm) and a distance of 2.5 - 3 ft (75 - 90 cm) between rows and 4 - 6 in (10 - 15 cm) between plants.
- Marrows (Only in frost-free areas) - Marrows take 2½ to 3½ months to mature. Plant at a depth of 1.5 - 2 in (4 - 5 cm) and a distance of 6 - 9 ft (180 - 270 cm) between rows and 3 - 5 ft (90 - 150 cm) between plants.
- Onions (Seedbed for sets) - Onions take 6 to 8 months to mature. Plant at a depth of 0.5 in (1.5 cm) and a distance of 1 - 1.25 ft (30 - 36 cm) between rows and 4 in (10 cm) between plants.
- Peas (Only in cool areas) - Peas take 2½ to 4 months to mature. Plant at a depth of 2 in (5 cm) and a distance of 2.5 ft (75 cm) between rows and 2 - 3 in (5 - 7.5 cm) between plants.
- Peppers (Provide protection in cool and cold areas) - Peppers take 2 to 3 months to mature. Plant at a depth of 0.5 in (1.5 cm) and a distance of 1.5 - 3 ft (45 - 90 cm) between rows and 12 - 24 in (30 - 60 cm) between plants.
- Potatoes (Except in hot and very hot areas) - Potatoes take 3 to 5 months to mature. Plant at a depth of 5 - 6 in (12 - 15 cm) and a distance of 3 ft (90 cm) between rows and 12 in (30 cm) between plants.
- Pumpkins (Only in frost-free areas) - Pumpkins take 4 to 6 months to mature. Plant at a depth of 1.5 - 2 in (4 - 5 cm) and a distance of 4 ft (120 cm) between rows and 2 - 3 ft (60 - 90 cm) between plants.
- Radishes - Radishes take 1 month to mature. Plant at a depth of 0.5 in (1.5 cm) and a distance of 0.75 - 1.5 ft (15 - 30 cm) between rows and 1 in (2.5 cm) between plants.
- Spinach Beets (Only in cool areas) - Spinach Beets take 2 to 3 months to mature. Plant at a depth of 0.5 in (1.5 cm) and a distance of 1 - 1.5 ft (30 - 45 cm) between rows and 9 in (22 cm) between plants.
- Swiss Chard (Only in cool areas) - Swiss Chard take 2 to 3 months to mature. Plant at a depth of 0.5 in (1.5 cm) and a distance of 1 - 1.5 ft (30 - 45 cm) between rows and 9 in (22 cm) between plants.
- Tomatoes (staked) (Provide protection in cool and cold areas) - Tomatoes (staked) take 2½ to 3 months to mature. Plant at a depth of 0.25 in (0.5 cm) and a distance of 3 - 4 ft (90 - 120 cm) between rows and 18 - 24 in (45 - 60 cm) between plants.
- Tomatoes (unstaked) (Provide protection in cool and cold areas) - Tomatoes (unstaked) take 2½ to 3 months to mature. Plant at a depth of 0.25 in (0.5 cm) and a distance of 4 - 5 ft (120 - 150 cm) between rows and 3 ft (90 cm) between plants.
- Turnips - Turnips take 2 to 3 months to mature. Plant at a depth of 0.25 - 0.5 in (0.5 - 1.5 cm) and a distance of 1 ft (30 cm) between rows and 4 - 6 in (10 - 15 cm) between plants.
Early Spring (March in the Northern Hemisphere • September in the Southern Hemisphere)
- Aubergines (Provide protection for seedbeds and transplant when danger of frost has past) - Aubergines take 2½ to 4 months to mature. Plant at a depth of 0.5 - 1 in (1.5 - 3 cm) and a distance of 2 ft (60 cm) between rows and 24 in (60 cm) between plants.
- Beans (bush) (Only when danger of frost has past) - Beans (bush) take 2 to 3 months to mature. Plant at a depth of 1.5 - 2 in (4 - 5 cm) and a distance of 1.5 - 2.5 ft (45 - 75 cm) between rows and 3 - 5 in (7.5 - 12.5 cm) between plants.
- Beans (pole) (Only when danger of frost has past) - Beans (pole) take 2½ to 4 months to mature. Plant at a depth of 1.5 - 2 in (4 - 5 cm) and a distance of 3 - 4 ft (90 - 120 cm) between rows and 6 - 9 in (15 - 22 cm) between plants.
- Beetroots (Except in hot and very hot areas) - Beetroots take 2 to 3 months to mature. Plant at a depth of 0.5 in (1.5 cm) and a distance of 2.5 ft (45 cm) between rows and 2 - 3 in (5 - 7.5 cm) between plants.
- Brinjals (Provide protection for seedbeds and transplant when danger of frost has past) - Brinjals take 2½ to 4 months to mature. Plant at a depth of 0.5 - 1 in (1.5 - 3 cm) and a distance of 2 ft (60 cm) between rows and 24 in (60 cm) between plants.
- Broccoli (Except in hot and very hot areas) - Broccoli take 3 to 4 months to mature. Plant at a depth of 0.5 in (1.5 cm) and a distance of 1.5 - 2 ft (45 - 60 cm) between rows and 18 in (45 cm) between plants.
- Cabbages - Cabbages take 3 to 5 months to mature. Plant at a depth of 0.75 in (2 cm) and a distance of 1.5 - 2 ft (45 - 60 cm) between rows and 12 - 18 in (30 - 45 cm) between plants.
- Carrots (Except in hot and very hot areas) - Carrots take 2½ to 3½ months to mature. Plant at a depth of 0.5 in (1.5 cm) and a distance of 1.25 - 1.5 ft (40 - 45 cm) between rows and 1 in (2.5 cm) between plants.
- Chilies (Provide protection for seedbeds and transplant when danger of frost has past) - Chilies take 2 to 3 months to mature. Plant at a depth of 0.5 in (1.5 cm) and a distance of 1.5 - 3 ft (45 - 90 cm) between rows and 12 - 24 in (30 - 60 cm) between plants.
- Corn (Only when danger of frost has past) - Corn take 2 to 3 months to mature. Plant at a depth of 0.5 in (1.5 cm) and a distance of 1 - 2 ft (30 - 60 cm) between rows and 12 in (30 cm) between plants.
- Cucumbers (Only in frost-free areas) - Cucumbers take 2 to 3 months to mature. Plant at a depth of 0.5 - 1 in (1.5 - 3 cm) and a distance of 4 - 6 ft (120 - 180 cm) between rows and 2 - 3 ft (60 - 90 cm) between plants.
- Egg plants (Provide protection for seedbeds and transplant when danger of frost has past) - Egg plants take 2½ to 4 months to mature. Plant at a depth of 0.5 - 1 in (1.5 - 3 cm) and a distance of 2 ft (60 cm) between rows and 24 in (60 cm) between plants.
- Gem squash (Only when danger of frost has past) - Gem squash take 2½ to 3½ months to mature. Plant at a depth of 1.5 - 2 in (4 - 5 cm) and a distance of 6 - 9 ft (180 - 270 cm) between rows and 3 - 5 ft (90 - 150 cm) between plants.
- Leeks (Except in hot and very hot areas) - Leeks take 6 to 7 months to mature. Plant at a depth of 0.25 in (0.5 cm) and a distance of 1 - 1.5 ft (30 - 45 cm) between rows and 6 - 8 in (15 - 20 cm) between plants.
- Lettuce - Lettuce take 2 to 3 months to mature. Plant at a depth of 0.25 - 0.5 in (0.5 - 1.5 cm) and a distance of 1 - 2 ft (30 - 60 cm) between rows and 9 - 12 in (22 - 30 cm) between plants.
- Lima beans - Lima beans take 2½ to 4 months to mature. Plant at a depth of 1.5 - 2 in (4 - 5 cm) and a distance of 2.5 - 3 ft (75 - 90 cm) between rows and 4 - 6 in (10 - 15 cm) between plants.
- Marrows (Only when danger of frost has past) - Marrows take 2½ to 3½ months to mature. Plant at a depth of 1.5 - 2 in (4 - 5 cm) and a distance of 6 - 9 ft (180 - 270 cm) between rows and 3 - 5 ft (90 - 150 cm) between plants.
- Peppers (Provide protection for seedbeds and transplant when danger of frost has past) - Peppers take 2 to 3 months to mature. Plant at a depth of 0.5 in (1.5 cm) and a distance of 1.5 - 3 ft (45 - 90 cm) between rows and 12 - 24 in (30 - 60 cm) between plants.
- Potatoes (Only in cool areas) - Potatoes take 3 to 5 months to mature. Plant at a depth of 5 - 6 in (12 - 15 cm) and a distance of 3 ft (90 cm) between rows and 12 in (30 cm) between plants.
- Pumpkins (Only when danger of frost has past) - Pumpkins take 4 to 6 months to mature. Plant at a depth of 1.5 - 2 in (4 - 5 cm) and a distance of 4 ft (120 cm) between rows and 2 - 3 ft (60 - 90 cm) between plants.
- Radishes - Radishes take 1 month to mature. Plant at a depth of 0.5 in (1.5 cm) and a distance of 0.75 - 1.5 ft (15 - 30 cm) between rows and 1 in (2.5 cm) between plants.
- Spinach Beets (Except in hot and very hot areas) - Spinach Beets take 2 to 3 months to mature. Plant at a depth of 0.5 in (1.5 cm) and a distance of 1 - 1.5 ft (30 - 45 cm) between rows and 9 in (22 cm) between plants.
- Swiss Chard (Except in hot and very hot areas) - Swiss Chard take 2 to 3 months to mature. Plant at a depth of 0.5 in (1.5 cm) and a distance of 1 - 1.5 ft (30 - 45 cm) between rows and 9 in (22 cm) between plants.
- Tomatoes (staked) (Provide protection for seedbeds and transplant when danger of frost has past) - Tomatoes (staked) take 2½ to 3 months to mature. Plant at a depth of 0.25 in (0.5 cm) and a distance of 3 - 4 ft (90 - 120 cm) between rows and 18 - 24 in (45 - 60 cm) between plants.
- Tomatoes (unstaked) (Provide protection for seedbeds and transplant when danger of frost has past) - Tomatoes (unstaked) take 2½ to 3 months to mature. Plant at a depth of 0.25 in (0.5 cm) and a distance of 4 - 5 ft (120 - 150 cm) between rows and 3 ft (90 cm) between plants.
- Turnips (Only in cool areas) - Turnips take 2 to 3 months to mature. Plant at a depth of 0.25 - 0.5 in (0.5 - 1.5 cm) and a distance of 1 ft (30 cm) between rows and 4 - 6 in (10 - 15 cm) between plants.
Mid-Spring (April in the Northern Hemisphere • October in the Southern Hemisphere)
- Aubergines - Aubergines take 2½ to 4 months to mature. Plant at a depth of 0.5 - 1 in (1.5 - 3 cm) and a distance of 2 ft (60 cm) between rows and 24 in (60 cm) between plants.
- Beans (bush) - Beans (bush) take 2 to 3 months to mature. Plant at a depth of 1.5 - 2 in (4 - 5 cm) and a distance of 1.5 - 2.5 ft (45 - 75 cm) between rows and 3 - 5 in (7.5 - 12.5 cm) between plants.
- Beans (pole) - Beans (pole) take 2½ to 4 months to mature. Plant at a depth of 1.5 - 2 in (4 - 5 cm) and a distance of 3 - 4 ft (90 - 120 cm) between rows and 6 - 9 in (15 - 22 cm) between plants.
- Beetroots (Except in hot and very hot areas) - Beetroots take 2 to 3 months to mature. Plant at a depth of 0.5 in (1.5 cm) and a distance of 2.5 ft (45 cm) between rows and 2 - 3 in (5 - 7.5 cm) between plants.
- Brinjals - Brinjals take 2½ to 4 months to mature. Plant at a depth of 0.5 - 1 in (1.5 - 3 cm) and a distance of 2 ft (60 cm) between rows and 24 in (60 cm) between plants.
- Broccoli (Except in hot and very hot areas) - Broccoli take 3 to 4 months to mature. Plant at a depth of 0.5 in (1.5 cm) and a distance of 1.5 - 2 ft (45 - 60 cm) between rows and 18 in (45 cm) between plants.
- Cabbages (Except in hot wet areas) - Cabbages take 3 to 5 months to mature. Plant at a depth of 0.75 in (2 cm) and a distance of 1.5 - 2 ft (45 - 60 cm) between rows and 12 - 18 in (30 - 45 cm) between plants.
- Carrots (Except in hot and very hot areas) - Carrots take 2½ to 3½ months to mature. Plant at a depth of 0.5 in (1.5 cm) and a distance of 1.25 - 1.5 ft (40 - 45 cm) between rows and 1 in (2.5 cm) between plants.
- Chilies - Chilies take 2 to 3 months to mature. Plant at a depth of 0.5 in (1.5 cm) and a distance of 1.5 - 3 ft (45 - 90 cm) between rows and 12 - 24 in (30 - 60 cm) between plants.
- Corn - Corn take 2 to 3 months to mature. Plant at a depth of 0.5 in (1.5 cm) and a distance of 1 - 2 ft (30 - 60 cm) between rows and 12 in (30 cm) between plants.
- Cucumbers - Cucumbers take 2 to 3 months to mature. Plant at a depth of 0.5 - 1 in (1.5 - 3 cm) and a distance of 4 - 6 ft (120 - 180 cm) between rows and 2 - 3 ft (60 - 90 cm) between plants.
- Egg plants - Egg plants take 2½ to 4 months to mature. Plant at a depth of 0.5 - 1 in (1.5 - 3 cm) and a distance of 2 ft (60 cm) between rows and 24 in (60 cm) between plants.
- Gem squash - Gem squash take 2½ to 3½ months to mature. Plant at a depth of 1.5 - 2 in (4 - 5 cm) and a distance of 6 - 9 ft (180 - 270 cm) between rows and 3 - 5 ft (90 - 150 cm) between plants.
- Leeks (Except in hot and very hot areas) - Leeks take 6 to 7 months to mature. Plant at a depth of 0.25 in (0.5 cm) and a distance of 1 - 1.5 ft (30 - 45 cm) between rows and 6 - 8 in (15 - 20 cm) between plants.
- Lettuce (Except in hot and very hot areas) - Lettuce take 2 to 3 months to mature. Plant at a depth of 0.25 - 0.5 in (0.5 - 1.5 cm) and a distance of 1 - 2 ft (30 - 60 cm) between rows and 9 - 12 in (22 - 30 cm) between plants.
- Lima beans - Lima beans take 2½ to 4 months to mature. Plant at a depth of 1.5 - 2 in (4 - 5 cm) and a distance of 2.5 - 3 ft (75 - 90 cm) between rows and 4 - 6 in (10 - 15 cm) between plants.
- Marrows - Marrows take 2½ to 3½ months to mature. Plant at a depth of 1.5 - 2 in (4 - 5 cm) and a distance of 6 - 9 ft (180 - 270 cm) between rows and 3 - 5 ft (90 - 150 cm) between plants.
- Peppers - Peppers take 2 to 3 months to mature. Plant at a depth of 0.5 in (1.5 cm) and a distance of 1.5 - 3 ft (45 - 90 cm) between rows and 12 - 24 in (30 - 60 cm) between plants.
- Potatoes (Except in hot and very hot areas) - Potatoes take 3 to 5 months to mature. Plant at a depth of 5 - 6 in (12 - 15 cm) and a distance of 3 ft (90 cm) between rows and 12 in (30 cm) between plants.
- Pumpkins - Pumpkins take 4 to 6 months to mature. Plant at a depth of 1.5 - 2 in (4 - 5 cm) and a distance of 4 ft (120 cm) between rows and 2 - 3 ft (60 - 90 cm) between plants.
- Radishes - Radishes take 1 month to mature. Plant at a depth of 0.5 in (1.5 cm) and a distance of 0.75 - 1.5 ft (15 - 30 cm) between rows and 1 in (2.5 cm) between plants.
- Spinach Beets (Except in hot and very hot areas) - Spinach Beets take 2 to 3 months to mature. Plant at a depth of 0.5 in (1.5 cm) and a distance of 1 - 1.5 ft (30 - 45 cm) between rows and 9 in (22 cm) between plants.
- Swiss Chard (Except in hot and very hot areas) - Swiss Chard take 2 to 3 months to mature. Plant at a depth of 0.5 in (1.5 cm) and a distance of 1 - 1.5 ft (30 - 45 cm) between rows and 9 in (22 cm) between plants.
- Tomatoes (staked) - Tomatoes (staked) take 2½ to 3 months to mature. Plant at a depth of 0.25 in (0.5 cm) and a distance of 3 - 4 ft (90 - 120 cm) between rows and 18 - 24 in (45 - 60 cm) between plants.
- Tomatoes (unstaked) - Tomatoes (unstaked) take 2½ to 3 months to mature. Plant at a depth of 0.25 in (0.5 cm) and a distance of 4 - 5 ft (120 - 150 cm) between rows and 3 ft (90 cm) between plants.
- Turnips (Only in cool areas) - Turnips take 2 to 3 months to mature. Plant at a depth of 0.25 - 0.5 in (0.5 - 1.5 cm) and a distance of 1 ft (30 cm) between rows and 4 - 6 in (10 - 15 cm) between plants.
Late Spring (May in the Northern Hemisphere • November in the Southern Hemisphere)
- Aubergines - Aubergines take 2½ to 4 months to mature. Plant at a depth of 0.5 - 1 in (1.5 - 3 cm) and a distance of 2 ft (60 cm) between rows and 24 in (60 cm) between plants.
- Beans (bush) - Beans (bush) take 2 to 3 months to mature. Plant at a depth of 1.5 - 2 in (4 - 5 cm) and a distance of 1.5 - 2.5 ft (45 - 75 cm) between rows and 3 - 5 in (7.5 - 12.5 cm) between plants.
- Beans (pole) - Beans (pole) take 2½ to 4 months to mature. Plant at a depth of 1.5 - 2 in (4 - 5 cm) and a distance of 3 - 4 ft (90 - 120 cm) between rows and 6 - 9 in (15 - 22 cm) between plants.
- Beetroots (Only in cool areas) - Beetroots take 2 to 3 months to mature. Plant at a depth of 0.5 in (1.5 cm) and a distance of 2.5 ft (45 cm) between rows and 2 - 3 in (5 - 7.5 cm) between plants.
- Brinjals - Brinjals take 2½ to 4 months to mature. Plant at a depth of 0.5 - 1 in (1.5 - 3 cm) and a distance of 2 ft (60 cm) between rows and 24 in (60 cm) between plants.
- Broccoli (Except in hot and very hot areas) - Broccoli take 3 to 4 months to mature. Plant at a depth of 0.5 in (1.5 cm) and a distance of 1.5 - 2 ft (45 - 60 cm) between rows and 18 in (45 cm) between plants.
- Cabbages (Except in very hot areas) - Cabbages take 3 to 5 months to mature. Plant at a depth of 0.75 in (2 cm) and a distance of 1.5 - 2 ft (45 - 60 cm) between rows and 12 - 18 in (30 - 45 cm) between plants.
- Carrots (Only in cool areas) - Carrots take 2½ to 3½ months to mature. Plant at a depth of 0.5 in (1.5 cm) and a distance of 1.25 - 1.5 ft (40 - 45 cm) between rows and 1 in (2.5 cm) between plants.
- Chilies - Chilies take 2 to 3 months to mature. Plant at a depth of 0.5 in (1.5 cm) and a distance of 1.5 - 3 ft (45 - 90 cm) between rows and 12 - 24 in (30 - 60 cm) between plants.
- Corn - Corn take 2 to 3 months to mature. Plant at a depth of 0.5 in (1.5 cm) and a distance of 1 - 2 ft (30 - 60 cm) between rows and 12 in (30 cm) between plants.
- Cucumbers - Cucumbers take 2 to 3 months to mature. Plant at a depth of 0.5 - 1 in (1.5 - 3 cm) and a distance of 4 - 6 ft (120 - 180 cm) between rows and 2 - 3 ft (60 - 90 cm) between plants.
- Egg plants - Egg plants take 2½ to 4 months to mature. Plant at a depth of 0.5 - 1 in (1.5 - 3 cm) and a distance of 2 ft (60 cm) between rows and 24 in (60 cm) between plants.
- Gem squash - Gem squash take 2½ to 3½ months to mature. Plant at a depth of 1.5 - 2 in (4 - 5 cm) and a distance of 6 - 9 ft (180 - 270 cm) between rows and 3 - 5 ft (90 - 150 cm) between plants.
- Lettuce (Only in cool areas) - Lettuce take 2 to 3 months to mature. Plant at a depth of 0.25 - 0.5 in (0.5 - 1.5 cm) and a distance of 1 - 2 ft (30 - 60 cm) between rows and 9 - 12 in (22 - 30 cm) between plants.
- Lima beans - Lima beans take 2½ to 4 months to mature. Plant at a depth of 1.5 - 2 in (4 - 5 cm) and a distance of 2.5 - 3 ft (75 - 90 cm) between rows and 4 - 6 in (10 - 15 cm) between plants.
- Marrows - Marrows take 2½ to 3½ months to mature. Plant at a depth of 1.5 - 2 in (4 - 5 cm) and a distance of 6 - 9 ft (180 - 270 cm) between rows and 3 - 5 ft (90 - 150 cm) between plants.
- Peppers - Peppers take 2 to 3 months to mature. Plant at a depth of 0.5 in (1.5 cm) and a distance of 1.5 - 3 ft (45 - 90 cm) between rows and 12 - 24 in (30 - 60 cm) between plants.
- Potatoes (Only in cool areas) - Potatoes take 3 to 5 months to mature. Plant at a depth of 5 - 6 in (12 - 15 cm) and a distance of 3 ft (90 cm) between rows and 12 in (30 cm) between plants.
- Pumpkins - Pumpkins take 4 to 6 months to mature. Plant at a depth of 1.5 - 2 in (4 - 5 cm) and a distance of 4 ft (120 cm) between rows and 2 - 3 ft (60 - 90 cm) between plants.
- Radishes (Except in hot and very hot areas) - Radishes take 1 month to mature. Plant at a depth of 0.5 in (1.5 cm) and a distance of 0.75 - 1.5 ft (15 - 30 cm) between rows and 1 in (2.5 cm) between plants.
- Spinach Beets (Except in hot and very hot areas) - Spinach Beets take 2 to 3 months to mature. Plant at a depth of 0.5 in (1.5 cm) and a distance of 1 - 1.5 ft (30 - 45 cm) between rows and 9 in (22 cm) between plants.
- Swiss Chard (Except in hot and very hot areas) - Swiss Chard take 2 to 3 months to mature. Plant at a depth of 0.5 in (1.5 cm) and a distance of 1 - 1.5 ft (30 - 45 cm) between rows and 9 in (22 cm) between plants.
- Tomatoes (staked) - Tomatoes (staked) take 2½ to 3 months to mature. Plant at a depth of 0.25 in (0.5 cm) and a distance of 3 - 4 ft (90 - 120 cm) between rows and 18 - 24 in (45 - 60 cm) between plants.
- Tomatoes (unstaked) - Tomatoes (unstaked) take 2½ to 3 months to mature. Plant at a depth of 0.25 in (0.5 cm) and a distance of 4 - 5 ft (120 - 150 cm) between rows and 3 ft (90 cm) between plants.
- Turnips (Only in cool areas) - Turnips take 2 to 3 months to mature. Plant at a depth of 0.25 - 0.5 in (0.5 - 1.5 cm) and a distance of 1 ft (30 cm) between rows and 4 - 6 in (10 - 15 cm) between plants.
Early Summer (June in the Northern Hemisphere • December in the Southern Hemisphere)
- Aubergines (Only in frost-free areas) - Aubergines take 2½ to 4 months to mature. Plant at a depth of 0.5 - 1 in (1.5 - 3 cm) and a distance of 2 ft (60 cm) between rows and 24 in (60 cm) between plants.
- Beans (bush) (Except in hot and very hot areas) - Beans take 2 to 3 months to mature. Plant at a depth of 1.5 - 2 in (4 - 5 cm) and a distance of 1.5 - 2.5 ft (45 - 75 cm) between rows and 3 - 5 in (7.5 - 12.5 cm) between plants.
- Beans (pole) (Except in hot and very hot areas) - Beans take 2½ to 4 months to mature. Plant at a depth of 1.5 - 2 in (4 - 5 cm) and a distance of 3 - 4 ft (90 - 120 cm) between rows and 6 - 9 in (15 - 22 cm) between plants.
- Beetroots (Only in cool areas) - Beetroots take 2 to 3 months to mature. Plant at a depth of 0.5 in (1.5 cm) and a distance of 2.5 ft (45 cm) between rows and 2 - 3 in (5 - 7.5 cm) between plants.
- Brinjals (Only in frost-free areas) - Brinjals take 2½ to 4 months to mature. Plant at a depth of 0.5 - 1 in (1.5 - 3 cm) and a distance of 2 ft (60 cm) between rows and 24 in (60 cm) between plants.
- Broccoli (Except in hot and very hot areas) - Broccoli take 3 to 4 months to mature. Plant at a depth of 0.5 in (1.5 cm) and a distance of 1.5 - 2 ft (45 - 60 cm) between rows and 18 in (45 cm) between plants.
- Cabbages (Except in very hot areas) - Cabbages take 3 to 5 months to mature. Plant at a depth of 0.75 in (2 cm) and a distance of 1.5 - 2 ft (45 - 60 cm) between rows and 12 - 18 in (30 - 45 cm) between plants.
- Carrots (Only in cool areas) - Carrots take 2½ to 3½ months to mature. Plant at a depth of 0.5 in (1.5 cm) and a distance of 1.25 - 1.5 ft (40 - 45 cm) between rows and 1 in (2.5 cm) between plants.
- Celery (Only in cool areas) - Celery take 3 to 5 months to mature. Plant at a depth of 0.25 in (0.5 cm) and a distance of 2.5 ft (45 cm) between rows and 6 in (15 cm) between plants.
- Chilies - Chilies take 2 to 3 months to mature. Plant at a depth of 0.5 in (1.5 cm) and a distance of 1.5 - 3 ft (45 - 90 cm) between rows and 12 - 24 in (30 - 60 cm) between plants.
- Corn - Corn take 2 to 3 months to mature. Plant at a depth of 0.5 in (1.5 cm) and a distance of 1 - 2 ft (30 - 60 cm) between rows and 12 in (30 cm) between plants.
- Cucumbers - Cucumbers take 2 to 3 months to mature. Plant at a depth of 0.5 - 1 in (1.5 - 3 cm) and a distance of 4 - 6 ft (120 - 180 cm) between rows and 2 - 3 ft (60 - 90 cm) between plants.
- Egg plants (Only in frost-free areas) - Egg plants take 2½ to 4 months to mature. Plant at a depth of 0.5 - 1 in (1.5 - 3 cm) and a distance of 2 ft (60 cm) between rows and 24 in (60 cm) between plants.
- Gem squash (Except in very hot areas) - Gem squash take 2½ to 3½ months to mature. Plant at a depth of 1.5 - 2 in (4 - 5 cm) and a distance of 6 - 9 ft (180 - 270 cm) between rows and 3 - 5 ft (90 - 150 cm) between plants.
- Leeks (Except in hot and very hot areas) - Leeks take 6 to 7 months to mature. Plant at a depth of 0.25 in (0.5 cm) and a distance of 1 - 1.5 ft (30 - 45 cm) between rows and 6 - 8 in (15 - 20 cm) between plants.
- Lettuce (Except in hot and very hot areas) - Lettuce take 2 to 3 months to mature. Plant at a depth of 0.25 - 0.5 in (0.5 - 1.5 cm) and a distance of 1 - 2 ft (30 - 60 cm) between rows and 9 - 12 in (22 - 30 cm) between plants.
- Lima beans (Except in hot and very hot areas) - Lima beans take 2½ to 4 months to mature. Plant at a depth of 1.5 - 2 in (4 - 5 cm) and a distance of 2.5 - 3 ft (75 - 90 cm) between rows and 4 - 6 in (10 - 15 cm) between plants.
- Marrows - Marrows take 2½ to 3½ months to mature. Plant at a depth of 1.5 - 2 in (4 - 5 cm) and a distance of 6 - 9 ft (180 - 270 cm) between rows and 3 - 5 ft (90 - 150 cm) between plants.
- Peppers - Peppers take 2 to 3 months to mature. Plant at a depth of 0.5 in (1.5 cm) and a distance of 1.5 - 3 ft (45 - 90 cm) between rows and 12 - 24 in (30 - 60 cm) between plants.
- Potatoes (Only in cool areas) - Potatoes take 3 to 5 months to mature. Plant at a depth of 5 - 6 in (12 - 15 cm) and a distance of 3 ft (90 cm) between rows and 12 in (30 cm) between plants.
- Pumpkins (Except in very hot areas) - Pumpkins take 4 to 6 months to mature. Plant at a depth of 1.5 - 2 in (4 - 5 cm) and a distance of 4 ft (120 cm) between rows and 2 - 3 ft (60 - 90 cm) between plants.
- Radishes (Except in very hot areas) - Radishes take 1 month to mature. Plant at a depth of 0.5 in (1.5 cm) and a distance of 0.75 - 1.5 ft (15 - 30 cm) between rows and 1 in (2.5 cm) between plants.
- Spinach Beets (Except in very hot areas) - Spinach Beets take 2 to 3 months to mature. Plant at a depth of 0.5 in (1.5 cm) and a distance of 1 - 1.5 ft (30 - 45 cm) between rows and 9 in (22 cm) between plants.
- Swiss Chard (Except in very hot areas) - Swiss Chard take 2 to 3 months to mature. Plant at a depth of 0.5 in (1.5 cm) and a distance of 1 - 1.5 ft (30 - 45 cm) between rows and 9 in (22 cm) between plants.
- Tomatoes (staked) - Tomatoes (staked) take 2½ to 3 months to mature. Plant at a depth of 0.25 in (0.5 cm) and a distance of 3 - 4 ft (90 - 120 cm) between rows and 18 - 24 in (45 - 60 cm) between plants.
- Tomatoes (unstaked) - Tomatoes (unstaked) take 2½ to 3 months to mature. Plant at a depth of 0.25 in (0.5 cm) and a distance of 4 - 5 ft (120 - 150 cm) between rows and 3 ft (90 cm) between plants.
- Turnips (Only in cool areas) - Turnips take 2 to 3 months to mature. Plant at a depth of 0.25 - 0.5 in (0.5 - 1.5 cm) and a distance of 1 ft (30 cm) between rows and 4 - 6 in (10 - 15 cm) between plants.
Mid-Summer (July in the Northern Hemisphere • January in the Southern Hemisphere)
- Aubergines (Only in frost-free areas) - Aubergines take 2 and a half to 4 months to mature. Plant at a depth of 0.5 - 1 in (1.5 - 3 cm) and a distance of 2 ft (60 cm) between rows and 24 in (60 cm) between plants.
- Beans (bush) - Beans (bush) take 2 to 3 months to mature. Plant at a depth of 1.5 - 2 in (4 - 5 cm) and a distance of 1.5 - 2.5 ft (45 - 75 cm) between rows and 3 - 5 in (7.5 - 12.5 cm) between plants.
- Beans (pole) - Beans (pole) take 2½ to 4 months to mature. Plant at a depth of 1.5 - 2 in (4 - 5 cm) and a distance of 3 - 4 ft (90 - 120 cm) between rows and 6 - 9 in (15 - 22 cm) between plants.
- Beetroots (Only in cool areas) - Beetroots take 2 to 3 months to mature. Plant at a depth of 0.5 in (1.5 cm) and a distance of 2.5 ft (45 cm) between rows and 2 - 3 in (5 - 7.5 cm) between plants.
- Brinjals (Only in frost-free areas) - Brinjals take 2½ to 4 months to mature. Plant at a depth of 0.5 - 1 in (1.5 - 3 cm) and a distance of 2 ft (60 cm) between rows and 24 in (60 cm) between plants.
- Broccoli (Only in cool areas) - Broccoli take 3 to 4 months to mature. Plant at a depth of 0.5 in (1.5 cm) and a distance of 1.5 - 2 ft (45 - 60 cm) between rows and 18 in (45 cm) between plants.
- Cabbages - Cabbages take 3 to 5 months to mature. Plant at a depth of 0.75 in (2 cm) and a distance of 1.5 - 2 ft (45 - 60 cm) between rows and 12 - 18 in (30 - 45 cm) between plants.
- Carrots (Only in cool areas) - Carrots take 2½ to 3½ months to mature. Plant at a depth of 0.5 in (1.5 cm) and a distance of 1.25 - 1.5 ft (40 - 45 cm) between rows and 1 in (2.5 cm) between plants.
- Cauliflower - Cauliflower take 2 to 5 months to mature. Plant at a depth of 0.5 in (1.5 cm) and a distance of 2 - 3 ft (60 - 90 cm) between rows and 18 - 24 in (45 - 60 cm) between plants.
- Chilies (Only transplant in cool areas) - Chilies take 2 to 3 months to mature. Plant at a depth of 0.5 in (1.5 cm) and a distance of 1.5 - 3 ft (45 - 90 cm) between rows and 12 - 24 in (30 - 60 cm) between plants.
- Corn - Corn take 2 to 3 months to mature. Plant at a depth of 0.5 in (1.5 cm) and a distance of 1 - 2 ft (30 - 60 cm) between rows and 12 in (30 cm) between plants.
- Cucumbers - Cucumbers take 2 to 3 months to mature. Plant at a depth of 0.5 - 1 in (1.5 - 3 cm) and a distance of 4 - 6 ft (120 - 180 cm) between rows and 2 - 3 ft (60 - 90 cm) between plants.
- Egg plants (Only in frost-free areas) - Egg plants take 2½ to 4 months to mature. Plant at a depth of 0.5 - 1 in (1.5 - 3 cm) and a distance of 2 ft (60 cm) between rows and 24 in (60 cm) between plants.
- Gem squash - Gem squash take 2½ to 3½ months to mature. Plant at a depth of 1.5 - 2 in (4 - 5 cm) and a distance of 6 - 9 ft (180 - 270 cm) between rows and 3 - 5 ft (90 - 150 cm) between plants.
- Leeks - Leeks take 6 to 7 months to mature. Plant at a depth of 0.25 in (0.5 cm) and a distance of 1 - 1.5 ft (30 - 45 cm) between rows and 6 - 8 in (15 - 20 cm) between plants.
- Lettuce (Only in cool areas) - Lettuce take 2 to 3 months to mature. Plant at a depth of 0.25 - 0.5 in (0.5 - 1.5 cm) and a distance of 1 - 2 ft (30 - 60 cm) between rows and 9 - 12 in (22 - 30 cm) between plants.
- Lima beans - Lima beans take 2½ to 4 months to mature. Plant at a depth of 1.5 - 2 in (4 - 5 cm) and a distance of 2.5 - 3 ft (75 - 90 cm) between rows and 4 - 6 in (10 - 15 cm) between plants.
- Marrows - Marrows take 2½ to 3½ months to mature. Plant at a depth of 1.5 - 2 in (4 - 5 cm) and a distance of 6 - 9 ft (180 - 270 cm) between rows and 3 - 5 ft (90 - 150 cm) between plants.
- Peppers (Only transplant in cool areas) - Peppers take 2 to 3 months to mature. Plant at a depth of 0.5 in (1.5 cm) and a distance of 1.5 - 3 ft (45 - 90 cm) between rows and 12 - 24 in (30 - 60 cm) between plants.
- Potatoes (Only in cool areas) - Potatoes take 3 to 5 months to mature. Plant at a depth of 5 - 6 in (12 - 15 cm) and a distance of 3 ft (90 cm) between rows and 12 in (30 cm) between plants.
- Pumpkins (Only in warm areas) - Pumpkins take 4 to 6 months to mature. Plant at a depth of 1.5 - 2 in (4 - 5 cm) and a distance of 4 ft (120 cm) between rows and 2 - 3 ft (60 - 90 cm) between plants.
- Radishes - Radishes take 1 month to mature. Plant at a depth of 0.5 in (1.5 cm) and a distance of 0.75 - 1.5 ft (15 - 30 cm) between rows and 1 in (2.5 cm) between plants.
- Spinach Beets (Except in very hot areas) - Spinach Beets take 2 to 3 months to mature. Plant at a depth of 0.5 in (1.5 cm) and a distance of 1 - 1.5 ft (30 - 45 cm) between rows and 9 in (22 cm) between plants.
- Swiss Chard (Except in very hot areas) - Swiss Chard take 2 to 3 months to mature. Plant at a depth of 0.5 in (1.5 cm) and a distance of 1 - 1.5 ft (30 - 45 cm) between rows and 9 in (22 cm) between plants.
- Tomatoes (staked) (Only transplant in cool areas) - Tomatoes (staked) take 2 and a half to 3 to mature. Plant at a depth of 0.25in (0.5 cm) and a distance of 3 - 4 ft (90 - 120 cm) between rows and 18 - 24 in (45 - 60 cm) between plants.
- Tomatoes (unstaked) (Only transplant in cool areas) - Tomatoes (unstaked) take 2 and a half to 3 to mature. Plant at a depth of 0.25in (0.5 cm) and a distance of 4 - 5 ft (120 - 150 cm) between rows and 3 ft (90 cm) between plants.
- Turnips (Only in cool areas) - Turnips take 2 to 3 months to mature. Plant at a depth of 0.25 - 0.5 in (0.5 - 1.5 cm) and a distance of 1 ft (30 cm) between rows and 4 - 6 in (10 - 15 cm) between plants.
Late Summer (August in the Northern Hemisphere • February in the Southern Hemisphere)
- Aubergines (Only in frost-free areas) - Aubergines take 2½ to 4 months to mature. Plant at a depth of 0.5 - 1 in (1.5 - 3 cm) and a distance of 2 ft (60 cm) between rows and 24 in (60 cm) between plants.
- Beans (bush) (Early in the month in cool areas) - Beans (bush) take 2 to 3 months to mature. Plant at a depth of 1.5 - 2 in (4 - 5 cm) and a distance of 1.5 - 2.5 ft (45 - 75 cm) between rows and 3 - 5 in (7.5 - 12.5 cm) between plants.
- Beans (pole) (Early in the month in cool areas) - Beans (pole) take 2½ to 4 months to mature. Plant at a depth of 1.5 - 2 in (4 - 5 cm) and a distance of 3 - 4 ft (90 - 120 cm) between rows and 6 - 9 in (15 - 22 cm) between plants.
- Beetroots - Beetroots take 2 to 3 months to mature. Plant at a depth of 0.5 in (1.5 cm) and a distance of 2.5 ft (45 cm) between rows and 2 - 3 in (5 - 7.5 cm) between plants.
- Brinjals (Only in frost-free areas) - Brinjals take 2½ to 4 months to mature. Plant at a depth of 0.5 - 1 in (1.5 - 3 cm) and a distance of 2 ft (60 cm) between rows and 24 in (60 cm) between plants.
- Broccoli - Broccoli take 3 to 4 months to mature. Plant at a depth of 0.5 in (1.5 cm) and a distance of 1.5 - 2 ft (45 - 60 cm) between rows and 18 in (45 cm) between plants.
- Brussels sprouts - Brussels sprouts take 4 to 5 months to mature. Plant at a depth of 0.75 in (2 cm) and a distance of 2 ft (60 cm) between rows and 18 in (45 cm) between plants.
- Cabbages - Cabbages take 3 to 5 months to mature. Plant at a depth of 0.75 in (2 cm) and a distance of 1.5 - 2 ft (45 - 60 cm) between rows and 12 - 18 in (30 - 45 cm) between plants.
- Carrots - Carrots take 2½ to 3½ months to mature. Plant at a depth of 0.5 in (1.5 cm) and a distance of 1.25 - 1.5 ft (40 - 45 cm) between rows and 1 in (2.5 cm) between plants.
- Cauliflower - Cauliflower take 2 to 5 months to mature. Plant at a depth of 0.5 in (1.5 cm) and a distance of 2 - 3 ft (60 - 90 cm) between rows and 18 - 24 in (45 - 60 cm) between plants.
- Celery - Celery take 3 to 5 months to mature. Plant at a depth of 0.25 in (0.5 cm) and a distance of 2.5 ft (45 cm) between rows and 6 in (15 cm) between plants.
- Chilies (Only in frost-free areas) - Chilies take 2 to 3 months to mature. Plant at a depth of 0.5 in (1.5 cm) and a distance of 1.5 - 3 ft (45 - 90 cm) between rows and 12 - 24 in (30 - 60 cm) between plants.
- Corn (Only in frost-free areas) - Corn take 2 to 3 months to mature. Plant at a depth of 0.5 in (1.5 cm) and a distance of 1 - 2 ft (30 - 60 cm) between rows and 12 in (30 cm) between plants.
- Cucumbers (Only in frost-free areas) - Cucumbers take 2 to 3 months to mature. Plant at a depth of 0.5 - 1 in (1.5 - 3 cm) and a distance of 4 - 6 ft (120 - 180 cm) between rows and 2 - 3 ft (60 - 90 cm) between plants.
- Egg plants (Only in frost-free areas) - Egg plants take 2½ to 4 months to mature. Plant at a depth of 0.5 - 1 in (1.5 - 3 cm) and a distance of 2 ft (60 cm) between rows and 24 in (60 cm) between plants.
- Gem squash (Only in frost-free areas) - Gem squash take 2½ to 3½ months to mature. Plant at a depth of 1.5 - 2 in (4 - 5 cm) and a distance of 6 - 9 ft (180 - 270 cm) between rows and 3 - 5 ft (90 - 150 cm) between plants.
- Leeks (Only in frost-free areas) - Leeks take 6 to 7 months to mature. Plant at a depth of 0.25 in (0.5 cm) and a distance of 1 - 1.5 ft (30 - 45 cm) between rows and 6 - 8 in (15 - 20 cm) between plants.
- Lettuce - Lettuce take 2 to 3 months to mature. Plant at a depth of 0.25 - 0.5 in (0.5 - 1.5 cm) and a distance of 1 - 2 ft (30 - 60 cm) between rows and 9 - 12 in (22 - 30 cm) between plants.
- Lima beans (Early in the month in cool areas) - Lima beans take 2½ to 4 months to mature. Plant at a depth of 1.5 - 2 in (4 - 5 cm) and a distance of 2.5 - 3 ft (75 - 90 cm) between rows and 4 - 6 in (10 - 15 cm) between plants.
- Marrows (Only in frost-free areas) - Marrows take 2½ to 3½ months to mature. Plant at a depth of 1.5 - 2 in (4 - 5 cm) and a distance of 6 - 9 ft (180 - 270 cm) between rows and 3 - 5 ft (90 - 150 cm) between plants.
- Onions (Only in frost-free areas) - Onions take 6 to 8 months to mature. Plant at a depth of 0.5 in (1.5 cm) and a distance of 1 - 1.25 ft (30 - 36 cm) between rows and 4 in (10 cm) between plants.
- Peppers (Only in frost-free areas) - Peppers take 2 to 3 months to mature. Plant at a depth of 0.5 in (1.5 cm) and a distance of 1.5 - 3 ft (45 - 90 cm) between rows and 12 - 24 in (30 - 60 cm) between plants.
- Potatoes (Only in frost-free areas) - Potatoes take 3 to 5 months to mature. Plant at a depth of 5 - 6 in (12 - 15 cm) and a distance of 3 ft (90 cm) between rows and 12 in (30 cm) between plants.
- Pumpkins (Only in frost-free areas) - Pumpkins take 4 to 6 months to mature. Plant at a depth of 1.5 - 2 in (4 - 5 cm) and a distance of 4 ft (120 cm) between rows and 2 - 3 ft (60 - 90 cm) between plants.
- Radishes - Radishes take 1 month to mature. Plant at a depth of 0.5 in (1.5 cm) and a distance of 0.75 - 1.5 ft (15 - 30 cm) between rows and 1 in (2.5 cm) between plants.
- Spinach Beets - Spinach Beets take 2 to 3 months to mature. Plant at a depth of 0.5 in (1.5 cm) and a distance of 1 - 1.5 ft (30 - 45 cm) between rows and 9 in (22 cm) between plants.
- Swiss Chard - Swiss Chard take 2 to 3 months to mature. Plant at a depth of 0.5 in (1.5 cm) and a distance of 1 - 1.5 ft (30 - 45 cm) between rows and 9 in (22 cm) between plants.
- Tomatoes (staked) (Only in frost-free areas) - Tomatoes (staked) take 2½ to 3 months to mature. Plant at a depth of 0.25 in (0.5 cm) and a distance of 3 - 4 ft (90 - 120 cm) between rows and 18 - 24 in (45 - 60 cm) between plants.
- Tomatoes (unstaked) (Only in frost-free areas) - Tomatoes (unstaked) take 2½ to 3 months to mature. Plant at a depth of 0.25 in (0.5 cm) and a distance of 4 - 5 ft (120 - 150 cm) between rows and 3 ft (90 cm) between plants.
Early Fall (September in the Northern Hemisphere • March in the Southern Hemisphere)
- Aubergines (Only in hot areas) - Aubergines take 2½ to 4 months to mature. Plant at a depth of 0.5 - 1 in (1.5 - 3 cm) and a distance of 2 ft (60 cm) between rows and 24 in (60 cm) between plants.
- Beans (bush) (Only in frost-free areas) - Beans (bush) take 2 to 3 months to mature. Plant at a depth of 1.5 - 2 in (4 - 5 cm) and a distance of 1.5 - 2.5 ft (45 - 75 cm) between rows and 3 - 5 in (7.5 - 12.5 cm) between plants.
- Beans (pole) (Only in frost-free areas) - Beans (pole) take 2½ to 4 months to mature. Plant at a depth of 1.5 - 2 in (4 - 5 cm) and a distance of 3 - 4 ft (90 - 120 cm) between rows and 6 - 9 in (15 - 22 cm) between plants.
- Beetroots - Beetroots take 2 to 3 months to mature. Plant at a depth of 0.5 in (1.5 cm) and a distance of 2.5 ft (45 cm) between rows and 2 - 3 in (5 - 7.5 cm) between plants.
- Brinjals (Only in hot areas) - Brinjals take 2½ to 4 months to mature. Plant at a depth of 0.5 - 1 in (1.5 - 3 cm) and a distance of 2 ft (60 cm) between rows and 24 in (60 cm) between plants.
- Broccoli - Broccoli take 3 to 4 months to mature. Plant at a depth of 0.5 in (1.5 cm) and a distance of 1.5 - 2 ft (45 - 60 cm) between rows and 18 in (45 cm) between plants.
- Brussels sprouts - Brussels sprouts take 4 to 5 months to mature. Plant at a depth of 0.75 in (2 cm) and a distance of 2 ft (60 cm) between rows and 18 in (45 cm) between plants.
- Cabbages - Cabbages take 3 to 5 months to mature. Plant at a depth of 0.75 in (2 cm) and a distance of 1.5 - 2 ft (45 - 60 cm) between rows and 12 - 18 in (30 - 45 cm) between plants.
- Carrots - Carrots take 2½ to 3½ months to mature. Plant at a depth of 0.5 in (1.5 cm) and a distance of 1.25 - 1.5 ft (40 - 45 cm) between rows and 1 in (2.5 cm) between plants.
- Celery (Provide protection in cold areas) - Celery take 3 to 5 months to mature. Plant at a depth of 0.25 in (0.5 cm) and a distance of 2.5 ft (45 cm) between rows and 6 in (15 cm) between plants.
- Chilies (Only in frost-free areas) - Chilies take 2 to 3 months to mature. Plant at a depth of 0.5 in (1.5 cm) and a distance of 1.5 - 3 ft (45 - 90 cm) between rows and 12 - 24 in (30 - 60 cm) between plants.
- Corn (Only in frost-free areas) - Corn take 2 to 3 months to mature. Plant at a depth of 0.5 in (1.5 cm) and a distance of 1 - 2 ft (30 - 60 cm) between rows and 12 in (30 cm) between plants.
- Egg plants (Only in hot areas) - Egg plants take 2½ to 4 months to mature. Plant at a depth of 0.5 - 1 in (1.5 - 3 cm) and a distance of 2 ft (60 cm) between rows and 24 in (60 cm) between plants.
- Gem squash (Only in frost-free areas) - Gem squash take 2½ to 3½ months to mature. Plant at a depth of 1.5 - 2 in (4 - 5 cm) and a distance of 6 - 9 ft (180 - 270 cm) between rows and 3 - 5 ft (90 - 150 cm) between plants.
- Lettuce - Lettuce take 2 to 3 months to mature. Plant at a depth of 0.25 - 0.5 in (0.5 - 1.5 cm) and a distance of 1 - 2 ft (30 - 60 cm) between rows and 9 - 12 in (22 - 30 cm) between plants.
- Lima beans (Only in frost-free areas) - Lima beans take 2½ to 4 months to mature. Plant at a depth of 1.5 - 2 in (4 - 5 cm) and a distance of 2.5 - 3 ft (75 - 90 cm) between rows and 4 - 6 in (10 - 15 cm) between plants.
- Marrows (Only in frost-free areas) - Marrows take 2½ to 3½ months to mature. Plant at a depth of 1.5 - 2 in (4 - 5 cm) and a distance of 6 - 9 ft (180 - 270 cm) between rows and 3 - 5 ft (90 - 150 cm) between plants.
- Onions - Onions take 6 to 8 months to mature. Plant at a depth of 0.5 in (1.5 cm) and a distance of 1 - 1.25 ft (30 - 36 cm) between rows and 4 in (10 cm) between plants.
- Peas (Only in frost-free areas) - Peas take 2½ to 4 months to mature. Plant at a depth of 2 in (5 cm) and a distance of 2.5 ft (75 cm) between rows and 2 - 3 in (5 - 7.5 cm) between plants.
- Peppers (Only in frost-free areas) - Peppers take 2 to 3 months to mature. Plant at a depth of 0.5 in (1.5 cm) and a distance of 1.5 - 3 ft (45 - 90 cm) between rows and 12 - 24 in (30 - 60 cm) between plants.
- Potatoes (Only in frost-free areas) - Potatoes take 3 to 5 months to mature. Plant at a depth of 5 - 6 in (12 - 15 cm) and a distance of 3 ft (90 cm) between rows and 12 in (30 cm) between plants.
- Pumpkins (Only in hot areas) - Pumpkins take 4 to 6 months to mature. Plant at a depth of 1.5 - 2 in (4 - 5 cm) and a distance of 4 ft (120 cm) between rows and 2 - 3 ft (60 - 90 cm) between plants.
- Radishes - Radishes take 1 month to mature. Plant at a depth of 0.5 in (1.5 cm) and a distance of 0.75 - 1.5 ft (15 - 30 cm) between rows and 1 in (2.5 cm) between plants.
- Tomatoes (staked) (Only in frost-free areas) - Tomatoes (staked) take 2½ to 3 months to mature. Plant at a depth of 0.25 in (0.5 cm) and a distance of 3 - 4 ft (90 - 120 cm) between rows and 18 - 24 in (45 - 60 cm) between plants.
- Tomatoes (unstaked) (Only in frost-free areas) - Tomatoes (unstaked) take 2½ to 3 months to mature. Plant at a depth of 0.25 in (0.5 cm) and a distance of 4 - 5 ft (120 - 150 cm) between rows and 3 ft (90 cm) between plants.
- Turnips - Turnips take 2 to 3 months to mature. Plant at a depth of 0.25 - 0.5 in (0.5 - 1.5 cm) and a distance of 1 ft (30 cm) between rows and 4 - 6 in (10 - 15 cm) between plants.
Mid-Fall (October in the Northern Hemisphere • April in the Southern Hemisphere)
- Aubergines (Only in hot areas) - Aubergines take 2½ to 4 months to mature. Plant at a depth of 0.5 - 1 in (1.5 - 3 cm) and a distance of 2 ft (60 cm) between rows and 24 in (60 cm) between plants.
- Beans (bush) (Only in frost-free areas) - Beans (bush) take 2 to 3 months to mature. Plant at a depth of 1.5 - 2 in (4 - 5 cm) and a distance of 1.5 - 2.5 ft (45 - 75 cm) between rows and 3 - 5 in (7.5 - 12.5 cm) between plants.
- Beans (pole) (Only in frost-free areas) - Beans (pole) take 2½ to 4 months to mature. Plant at a depth of 1.5 - 2 in (4 - 5 cm) and a distance of 3 - 4 ft (90 - 120 cm) between rows and 6 - 9 in (15 - 22 cm) between plants.
- Beetroots - Beetroots take 2 to 3 months to mature. Plant at a depth of 0.5 in (1.5 cm) and a distance of 2.5 ft (45 cm) between rows and 2 - 3 in (5 - 7.5 cm) between plants.
- Brinjals (Only in hot areas) - Brinjals take 2½ to 4 months to mature. Plant at a depth of 0.5 - 1 in (1.5 - 3 cm) and a distance of 2 ft (60 cm) between rows and 24 in (60 cm) between plants.
- Broccoli - Broccoli take 3 to 4 months to mature. Plant at a depth of 0.5 in (1.5 cm) and a distance of 1.5 - 2 ft (45 - 60 cm) between rows and 18 in (45 cm) between plants.
- Brussels sprouts - Brussels sprouts take 4 to 5 months to mature. Plant at a depth of 0.75 in (2 cm) and a distance of 2 ft (60 cm) between rows and 18 in (45 cm) between plants.
- Cabbages - Cabbages take 3 to 5 months to mature. Plant at a depth of 0.75 in (2 cm) and a distance of 1.5 - 2 ft (45 - 60 cm) between rows and 12 - 18 in (30 - 45 cm) between plants.
- Carrots - Carrots take 2½ to 3½ months to mature. Plant at a depth of 0.5 in (1.5 cm) and a distance of 1.25 - 1.5 ft (40 - 45 cm) between rows and 1 in (2.5 cm) between plants.
- Cauliflower - Cauliflower take 2 to 5 months to mature. Plant at a depth of 0.5 in (1.5 cm) and a distance of 2 - 3 ft (60 - 90 cm) between rows and 18 - 24 in (45 - 60 cm) between plants.
- Chilies (Only in frost-free areas) - Chilies take 2 to 3 months to mature. Plant at a depth of 0.5 in (1.5 cm) and a distance of 1.5 - 3 ft (45 - 90 cm) between rows and 12 - 24 in (30 - 60 cm) between plants.
- Corn (Only in frost-free areas) - Corn take 2 to 3 months to mature. Plant at a depth of 0.5 in (1.5 cm) and a distance of 1 - 2 ft (30 - 60 cm) between rows and 12 in (30 cm) between plants.
- Cucumbers (Only in hot areas) - Cucumbers take 2 to 3 months to mature. Plant at a depth of 0.5 - 1 in (1.5 - 3 cm) and a distance of 4 - 6 ft (120 - 180 cm) between rows and 2 - 3 ft (60 - 90 cm) between plants.
- Egg plants (Only in hot areas) - Egg plants take 2½ to 4 months to mature. Plant at a depth of 0.5 - 1 in (1.5 - 3 cm) and a distance of 2 ft (60 cm) between rows and 24 in (60 cm) between plants.
- Gem squash (Only in frost-free areas) - Gem squash take 2½ to 3½ months to mature. Plant at a depth of 1.5 - 2 in (4 - 5 cm) and a distance of 6 - 9 ft (180 - 270 cm) between rows and 3 - 5 ft (90 - 150 cm) between plants.
- Leeks - Leeks take 6 to 7 months to mature. Plant at a depth of 0.25 in (0.5 cm) and a distance of 1 - 1.5 ft (30 - 45 cm) between rows and 6 - 8 in (15 - 20 cm) between plants.
- Lettuce - Lettuce take 2 to 3 months to mature. Plant at a depth of 0.25 - 0.5 in (0.5 - 1.5 cm) and a distance of 1 - 2 ft (30 - 60 cm) between rows and 9 - 12 in (22 - 30 cm) between plants.
- Lima beans (Only in frost-free areas) - Lima beans take 2½ to 4 months to mature. Plant at a depth of 1.5 - 2 in (4 - 5 cm) and a distance of 2.5 - 3 ft (75 - 90 cm) between rows and 4 - 6 in (10 - 15 cm) between plants.
- Marrows (Only in frost-free areas) - Marrows take 2½ to 3½ months to mature. Plant at a depth of 1.5 - 2 in (4 - 5 cm) and a distance of 6 - 9 ft (180 - 270 cm) between rows and 3 - 5 ft (90 - 150 cm) between plants.
- Onions - Onions take 6 to 8 months to mature. Plant at a depth of 0.5 in (1.5 cm) and a distance of 1 - 1.25 ft (30 - 36 cm) between rows and 4 in (10 cm) between plants.
- Peppers (Only in frost-free areas) - Peppers take 2 to 3 months to mature. Plant at a depth of 0.5 in (1.5 cm) and a distance of 1.5 - 3 ft (45 - 90 cm) between rows and 12 - 24 in (30 - 60 cm) between plants.
- Potatoes (Only in frost-free areas) - Potatoes take 3 to 5 months to mature. Plant at a depth of 5 - 6 in (12 - 15 cm) and a distance of 3 ft (90 cm) between rows and 12 in (30 cm) between plants.
- Radishes - Radishes take 1 month to mature. Plant at a depth of 0.5 in (1.5 cm) and a distance of 0.75 - 1.5 ft (15 - 30 cm) between rows and 1 in (2.5 cm) between plants.
- Spinach Beets - Spinach Beets take 2 to 3 months to mature. Plant at a depth of 0.5 in (1.5 cm) and a distance of 1 - 1.5 ft (30 - 45 cm) between rows and 9 in (22 cm) between plants.
- Swiss Chard - Swiss Chard take 2 to 3 months to mature. Plant at a depth of 0.5 in (1.5 cm) and a distance of 1 - 1.5 ft (30 - 45 cm) between rows and 9 in (22 cm) between plants.
- Tomatoes (staked) (Only in frost-free areas) - Tomatoes (staked) take 2½ to 3 months to mature. Plant at a depth of 0.25 in (0.5 cm) and a distance of 3 - 4 ft (90 - 120 cm) between rows and 18 - 24 in (45 - 60 cm) between plants.
- Tomatoes (unstaked) (Only in frost-free areas) - Tomatoes (unstaked) take 2½ to 3 months to mature. Plant at a depth of 0.25 in (0.5 cm) and a distance of 4 - 5 ft (120 - 150 cm) between rows and 3 ft (90 cm) between plants.
- Turnips - Turnips take 2 to 3 months to mature. Plant at a depth of 0.25 - 0.5 in (0.5 - 1.5 cm) and a distance of 1 ft (30 cm) between rows and 4 - 6 in (10 - 15 cm) between plants.
16 Fast Growing Vegetables:
Here are the faster vegetable options that you can grow in your garden:
1. Arugula
Arugula is a wonderful little green that has a peppery flavor to it. We grew it previously at our old homestead. It was a delicious addition to our perennial garden.
So if you’d like to have a peppery green to toss in your salad, then you should consider growing it. All you’ll need to do is plant it, give it about 2 months to produce mature leaves, and then cut them when you’re ready to enjoy.
Then they’ll continue to grow back each year for your enjoyment.
2. Spinach

Spinach was one of the first things I ever tried growing. I did so because of how fast it grew and how simple it was to grow.
Basically, you directly sow the seeds into a good quality dirt. Then you’ll just need to water and wait. Before you know it, in about 4-6 weeks, you’ll have fresh spinach.
Then you will have a nice addition to any salad, or you could prepare the spinach fresh like in this recipe.
3. Baby Carrots
Baby carrots taste delicious, are a great snack, are great to cook with, and don’t take as long as full-sized carrots because they don’t have to grow to be as large.
So if you enjoy carrots and want them quickly, then you’ll definitely want to pick the baby carrot variety. Then you’ll just plant them in the ground, or in a container garden.
Either way, be sure to directly sow the seeds in quality dirt. Then in about 30 days, you’ll have your first harvest.
If you need more direction on growing carrots, here is a resource for you.
4. Radishes
Radishes are probably one of the fastest plants you can grow. They are also super simple to grow as well.
So if you’d like to try and grow your own vegetables, then this might be a good place to start. You’ll directly sow these seeds in quality dirt.
Then in about 25-30 days, you should have your first harvest.
5. Cucumbers
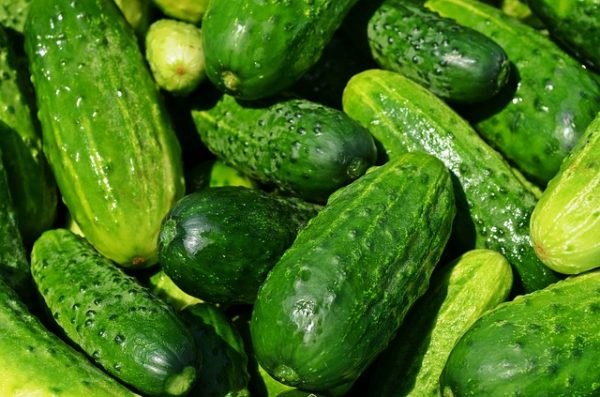
Cucumbers are a very versatile plant to grow. You can make lots of delicious recipes with them. You can start with eating them fresh.
Then they could be a great addition to a salad. When you are “cucumbered out”, you can start making pickles with the fresh cucumbers.
But be advised that cucumbers like to run so you’ll need to either place them on a trellis or give them plenty of space to grow.
6. Beets
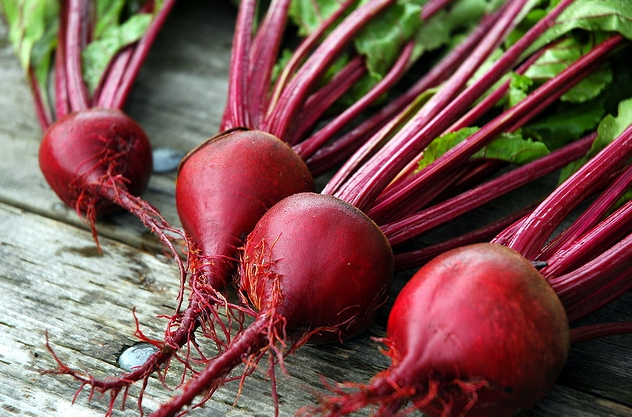
via Feed the Spirit
Beets are one of those vegetables that either you like or you don’t. But even if you don’t like the actual beet itself, you may enjoy the greens that come from the plant.
So either way, it is a great vegetable to grow if you’d like to have a harvest in a hurry. It is good to grow in the spring or when we are heading into fall because they can withstand a little heat, but don’t like the super hot temperatures we often experience during summer.
But if you plant beets, you can harvest the beets themselves in around 50 days. However, you can harvest the greens from the beets in about 30 days.
7. Bush Beans

via Real Foods
Bush beans are my favorite kind of bean. They grow beautifully in the garden, they are easier to prepare when canning green beans, and they also produce a quicker harvest.
So if you love tender green beans, then consider planting a bush bean variety. All you’ll need to do is directly sow the seeds into quality dirt.
Then over time, with water and sunlight, they will produce a beautiful green bean bush. In around 40-65 days you should have your first harvest of green beans.
Here are more details on how to grow green beans.
8. Bok Choy
Bok Choy is a fun plant. It looks fun, and it is even fun to say its name.
But it is also a great plant to grow because it can produce a mature harvest in around 30 days. If that isn’t a super fast plant, I’m not sure what is.
So if you are looking for something different to grow that will produce a fast harvest, then you should definitely consider Bok Choy.
9. Lettuce
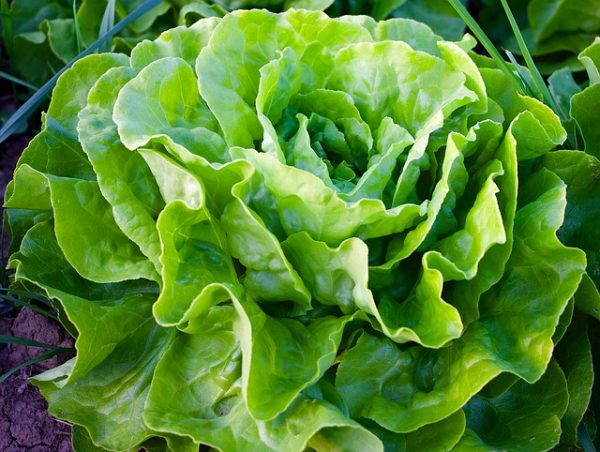
Lettuce is such a versatile plant. There are so many different varieties to choose from that you can have a different flavor and crunch with each one.
But the great thing about lettuce is that it is hearty so it can grow in colder temperatures, and it also doesn’t take very long to produce a mature harvest.
In fact, most lettuce can produce a harvest in about 30 days.
So if you want something healthy, green, and fast, then you should definitely consider lettuce.
10. Summer Squash
Summer squash is probably one of my favorite vegetables to enjoy during the warmer months. It tastes delicious, is easy to grow, and produces quickly too.
So if you need to learn how to grow your own squash, here is a great resource to help you along the way.
But a quick overview is basically, you directly sow the seeds in quality soil, water them, and wait for them to grow and produce.
However, you’ll want to be sure to harvest your squash or zucchini when they are young for better flavor.
11. Okra
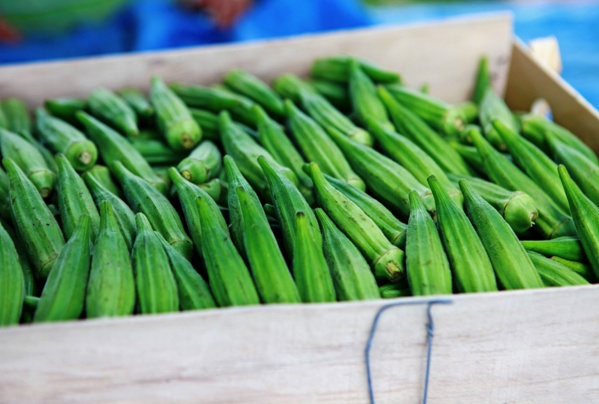
Okra is another favorite vegetable of mine. It only takes about 50 days to produce a mature harvest.
Then you are clear to pick it and fry it up into a delicious side dish that most enjoy.
But you can also prepare okra in other ways as well. Go ahead and enjoy this fast growing vegetable. You’ll be glad you tried it!
12. Kale/ Greens
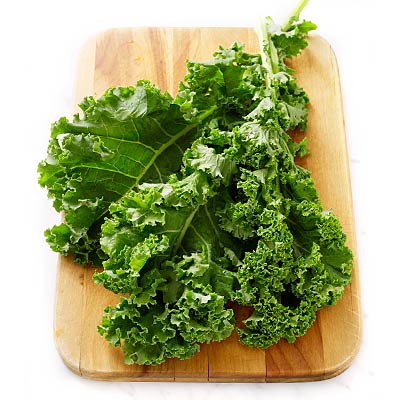
via health.com
I am a huge fan of greens and kale, but it has not always been that way. In fact, growing up, I wouldn’t touch them with a ten-foot pole.
But I’ve learned it is all in the preparation. I think I also love them even more now because I try to grow most of my family’s food.
And who doesn’t love a vegetable that is fast to produce? You can pick baby greens from kale or mustard greens in only 25 days.
Then you can have your mature leaves in about 50-65 days.
13. Snow Peas

via Pop Sugar
Peas have always been interesting to grow to me. In my experience, you have to plant a lot of them to get a decent harvest.
Now, for me when I say decent, I mean enough to eat and preserve.
But if you just like to plant something to eat on it, then this could still be a good option for you. Snow peas take around 10 days to complete the germination process.
Then you can harvest them at around 60 days. 2 months isn’t that long to have a vegetable ready to harvest.
14. Broccoli
I love broccoli. As a kid, it fascinated me because it looked like tiny trees. As an adult, I love it because I can put cheese on it, butter on it, or seasonings and enjoy it again and again.
But as someone that tries to produce most of their own food, I love broccoli because it likes colder weather. It is refreshing to be able to grow something green when the temperatures are still nippy outside.
So if you love broccoli too, then know that you can grow it and have it ready for harvest in around 60 days. That is how long it takes for it to make mature heads.
However, you could enjoy smaller heads of broccoli even sooner than that. It is all about your preference.
15. Green Onions

Green onions are another really versatile plant. You plant onions as bulbs. The bulbs take around 6 months to produce full-size onions.
But you can get green onion stalks at around 3-4 weeks. They taste delicious as a garnish for soups or to be added to stir-fry as well.
So if you want something green, fresh, and packed with onion flavor, then know that you can have all of that in less than a month.
16. Turnips
Turnips are another vegetable that is amazing because you get two products in one plant. Turnips produce a bulb that has a very unique flavor.
In my experience, you either love them or you don’t. My mother-in-law absolutely loved them. She’d eat them every meal if she could.
Whereas my husband and children won’t go anywhere near them.
So you’ll need to try them for yourself to see which category you’ll fall into.
But whether you like the actual turnips or not, they produce some amazing greens. I love turnip greens. You can boil them, pour off the first boil, then boil them again. This takes away some of their bitterness.
Then you cook them with some bacon, onions, crushed red pepper, salt, and pepper. You’ll have one amazing side dish.
So if this sounds good, then know that you can have turnip greens in 40 days and turnip roots in around 60 days.
Now you have 16 different fast growing vegetables to start your garden with. They can be grown at different times of the year which means you can have a fast harvest almost year round.
So hopefully, this will encourage you to produce some of your own food now that you know it doesn’t have to take an eternity to be able to harvest your vegetables.
But I’d like to know what vegetables you grow to get a quick harvest? What is your method for growing it?
We love hearing from you so leave us your comments in the section provided below.
Snap Beans
Snap beans are useful in warm summer weather. In addition to cropping rather quickly, beans are soil builders that benefit ensuing crops by fixing atmospheric nitrogen in their roots then releasing it when the plants die off. The fastest to produce are the bush types, ready to harvest in 50+ days. Try ‘Provider’ or ‘Contender’ varieties.
Not all vegetables take from spring from fall to mature. If you’re getting a late start on your home garden or live in a region with a short growing season, fear not. There are many healthy, delicious vegetables that are quick to harvest. Here are the 12 fastest growing vegetables to get your garden jumpstarted.
RADISHES
One of the fastest growing vegetables are radishes. Most varieties will be ready for harvest in just 25 to 30 days after planting. Ready to get those radishes started? Check out this set of six packs of radish seeds that includes Purple Plush, French Breakfast, Easter Egg, Watermelon, German Giant, and Black Spanish radish seeds.
One of the fastest growing vegetables are radishes. Most varieties will be ready for harvest in just 25 to 30 days after planting. Ready to get those radishes started? Check out this set of six packs of radish seeds that includes Purple Plush, French Breakfast, Easter Egg, Watermelon, German Giant, and Black Spanish radish seeds.
GREEN ONIONS
While it can take 6 months for onion bulbs to mature, the green onion stalks can be harvested after just 3 or 4 weeks. You can also grow onion microgreens and have baby onion greens in two to three weeks. Check out these organic green onion seeds. They’re non-GMO, non-hybrid heirloom seeds grown in the USA.
While it can take 6 months for onion bulbs to mature, the green onion stalks can be harvested after just 3 or 4 weeks. You can also grow onion microgreens and have baby onion greens in two to three weeks. Check out these organic green onion seeds. They’re non-GMO, non-hybrid heirloom seeds grown in the USA.
LETTUCE
Leaf lettuce such as Romaine can begin to be harvested about 30 days after planting. Cut the leaves once they reach at least 3 inches. I love to grow a variety of lettuces so there’s always a colorful mixture ready for the salad bowl. The Lettuce Lovers Assortment is a great way to get started. It features eight lettuce varieties including Red Romaine, Iceberg, Parris Island Co, Black Seeded Simplson, Lollo Rosso, Oakleaf, and Prizehead.
Leaf lettuce such as Romaine can begin to be harvested about 30 days after planting. Cut the leaves once they reach at least 3 inches. I love to grow a variety of lettuces so there’s always a colorful mixture ready for the salad bowl. The Lettuce Lovers Assortment is a great way to get started. It features eight lettuce varieties including Red Romaine, Iceberg, Parris Island Co, Black Seeded Simplson, Lollo Rosso, Oakleaf, and Prizehead.
BABY CARROTS
Baby carrots can be harvested after about 30 days. Other carrot varieties may take between 50 and 80 days to mature.
Baby carrots can be harvested after about 30 days. Other carrot varieties may take between 50 and 80 days to mature.
SPINACH
Spinach is ready in as little as 4 to 6 weeks after planting.
Spinach is ready in as little as 4 to 6 weeks after planting.
PEAS
Snow peas take only about 10 days to germinate and are ready for harvest in about 60 days.
Snow peas take only about 10 days to germinate and are ready for harvest in about 60 days.
BUSH BEANS
Most varieties of bush beans are ready to harvest within 40 to 65 days from planting.
Most varieties of bush beans are ready to harvest within 40 to 65 days from planting.
KALE & OTHER LEAFY GREENS
Kale, mustard greens and watercress are just a few delicious, super healthy greens that are fast growers. Most take about 50 to 65 days to mature, but baby leaves can be picked as early as 25 days.
Kale, mustard greens and watercress are just a few delicious, super healthy greens that are fast growers. Most take about 50 to 65 days to mature, but baby leaves can be picked as early as 25 days.
TURNIPS
Turnip roots are ready for harvest after about 60 days, however the highly edible leaves can be harvested in only 40 days.
Turnip roots are ready for harvest after about 60 days, however the highly edible leaves can be harvested in only 40 days.
SQUASH
Many varieties of squash, including zucchini, are usually ready after about 70 days. For best flavor, harvest squash when they are still small. Once you’ve got lots of zucchini harvested from your garden, turn them into healthy zucchini noodles (also known as zoodles). For recipes and ideas, check out one of our sister sites, Zucchini Noodle Recipes. There are zoodle recipes for almost every dietary plan!
Many varieties of squash, including zucchini, are usually ready after about 70 days. For best flavor, harvest squash when they are still small. Once you’ve got lots of zucchini harvested from your garden, turn them into healthy zucchini noodles (also known as zoodles). For recipes and ideas, check out one of our sister sites, Zucchini Noodle Recipes. There are zoodle recipes for almost every dietary plan!
CUCUMBER
Most varieties of cucumbers can be harvested about 50 to 70 days after planting.
Most varieties of cucumbers can be harvested about 50 to 70 days after planting.